Deep into the design: Front end and steering
I often say that KillaJoule is a “giant cordless drill with wheels”. What I refer to is of course that it is battery powered, but also that it is very simple at a conceptual level. Just like a cordless drill, it has a battery, motor, a throttle, and a bit of electronics in-between. And wheels. A giant cordless drill with wheels! However, on a detailed level things get much more complicated.
While the KillaJoule is utilizing off-the-shelf technology, the integration of all the parts into a small vehicle has been challenging, particularly since we have been working on a very tight budget. The drivetrain components (batteries, motors, and motor controllers), and quite a few other components, are sponsored by our great partners, but all the other expenses are paid privately by myself and my husband Bill. Compared to other racing teams at a world class level, we have a fraction of their budget. With some cleverness and a whole lot of hard work, you can make it work anyway.
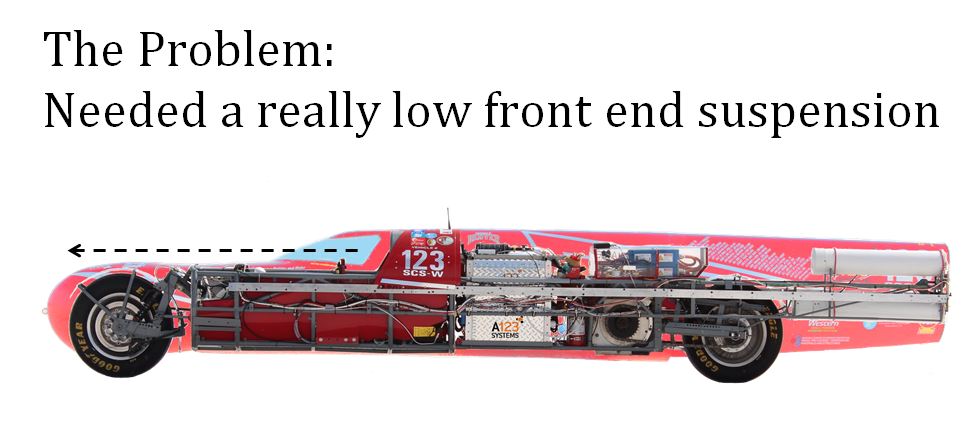
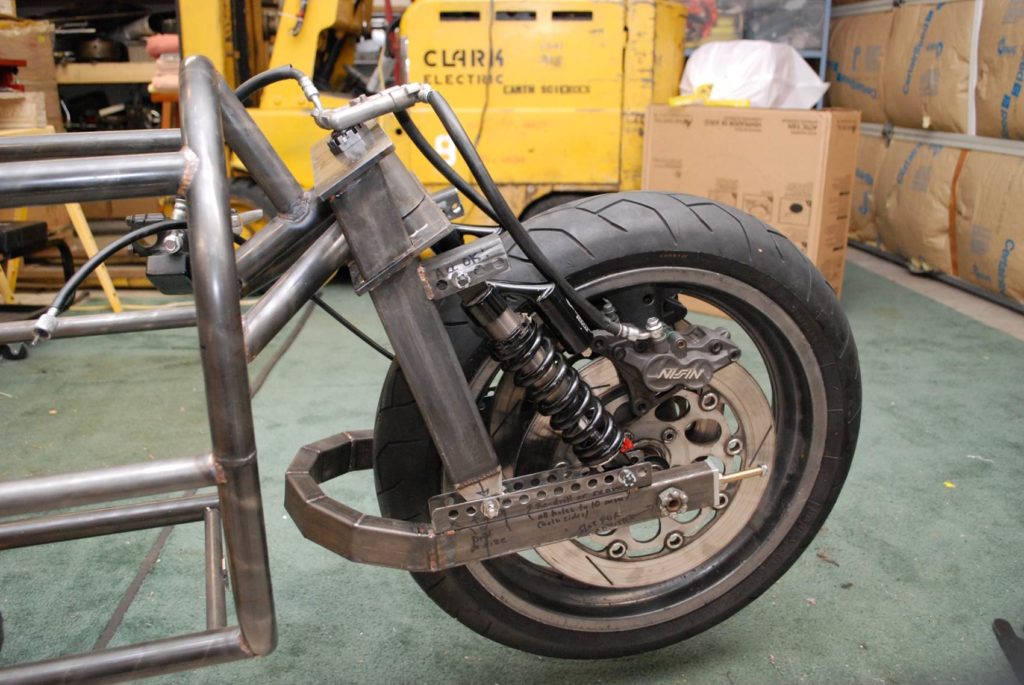
The steering and the front suspension of the KillaJoule was a design challenge in itself. We needed a solution that was relatively low so I can see over the front wheel without adding too much height to the vehicle. The taller a vehicle is, the larger its frontal area. Large frontal area means higher aerodynamic resistance. With high aerodynamic resistance – sometimes also called “drag” – the more power is needed to drive at a certain speed. Because I only had a certain amount of power, the smaller the frontal area, the faster the KillaJoule would go. Thus the need of making it as low as possible. For the front, a normal telescopic motorcycle fork would be too tall. We also needed something that we could build on our shoestring budget. Many other motorcycle streamliners have center hub steering, but it is really expensive and complicated to build and often give a lot of grief.
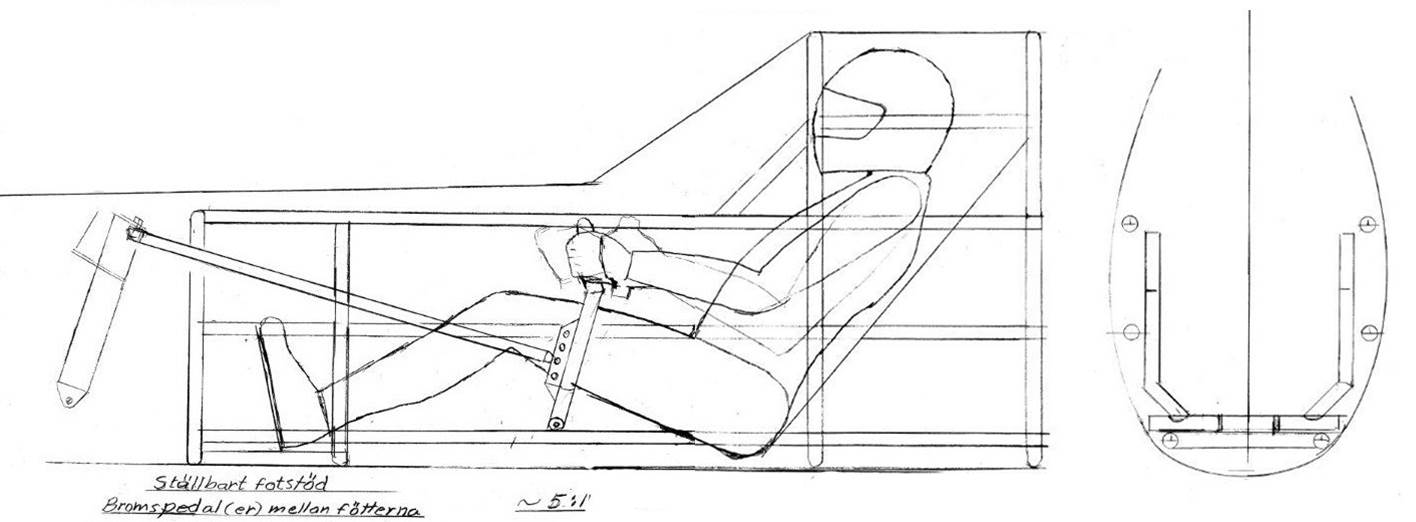
I did what I always do when I am faced with an engineering problem I can’t solve – I call my dad Sven! My dad sat down at this drawing board (an actual drawing board with paper and pencils), and created this solution for us. My mom scanned the drawing and emailed it to me, and I later received the original in the mail. Together with Clay and Gary Gardiner that helped us fabricate the original chassis, we built the whole front end in almost no time (like two days or so). It has worked great since ever. This is the story how we can up with the present design.
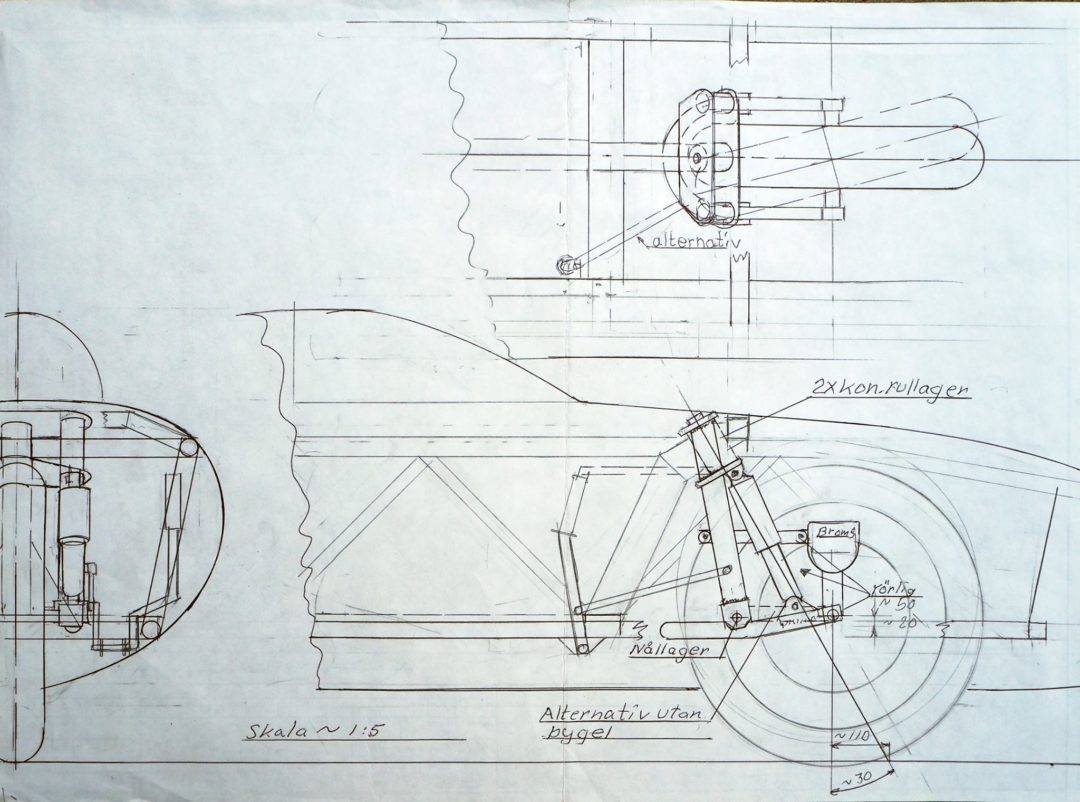
The original drawing for the front end and steering for the KillaJoule.
As you can see on the photo below, the KillaJoule has a very low nose, making the overall aerodynamic resistance low.  But, I am skipping ahead. Every time I have an engineering problem I can’t solve, I call my dad Sven.
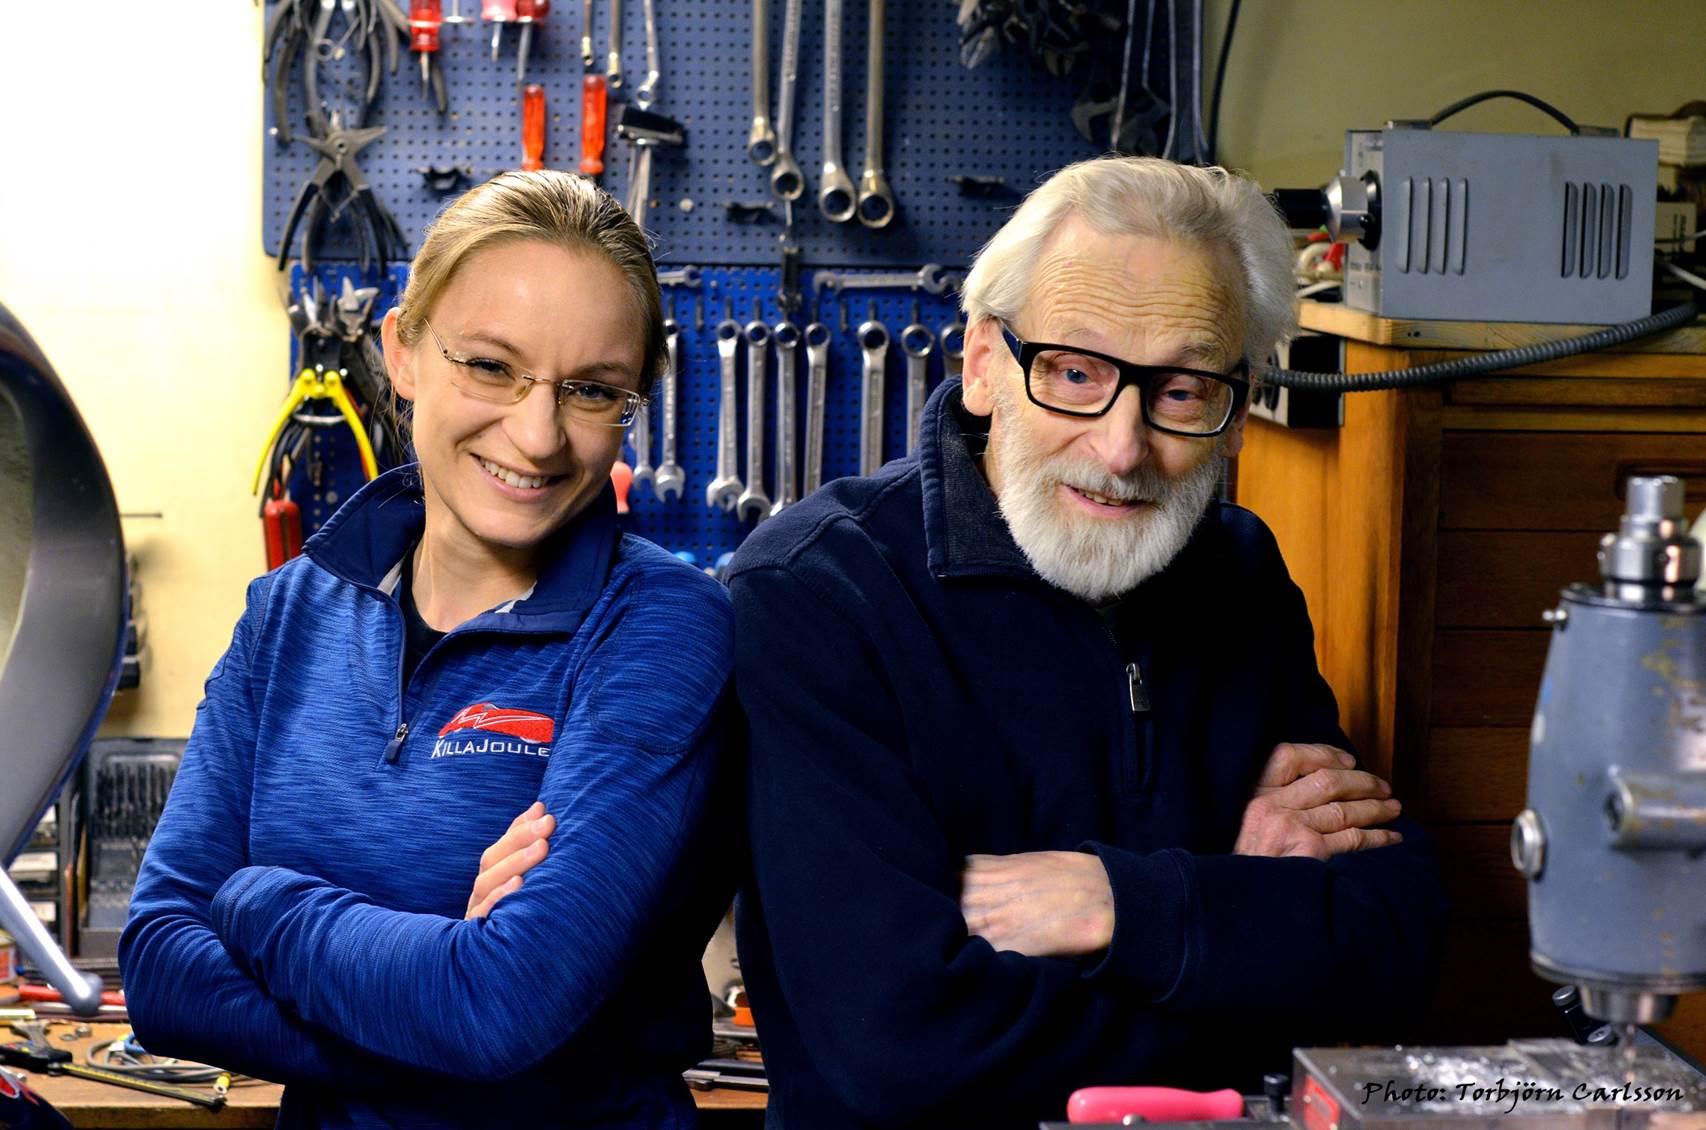
Sven is a 2nd generation mechanical engineer, and has built motorcycles all his life. He built his own racing motorcycles in his spare time, and was the Swedish Road Racing champion in the 50 cc class 1962. He even built his own engines, from scratch!
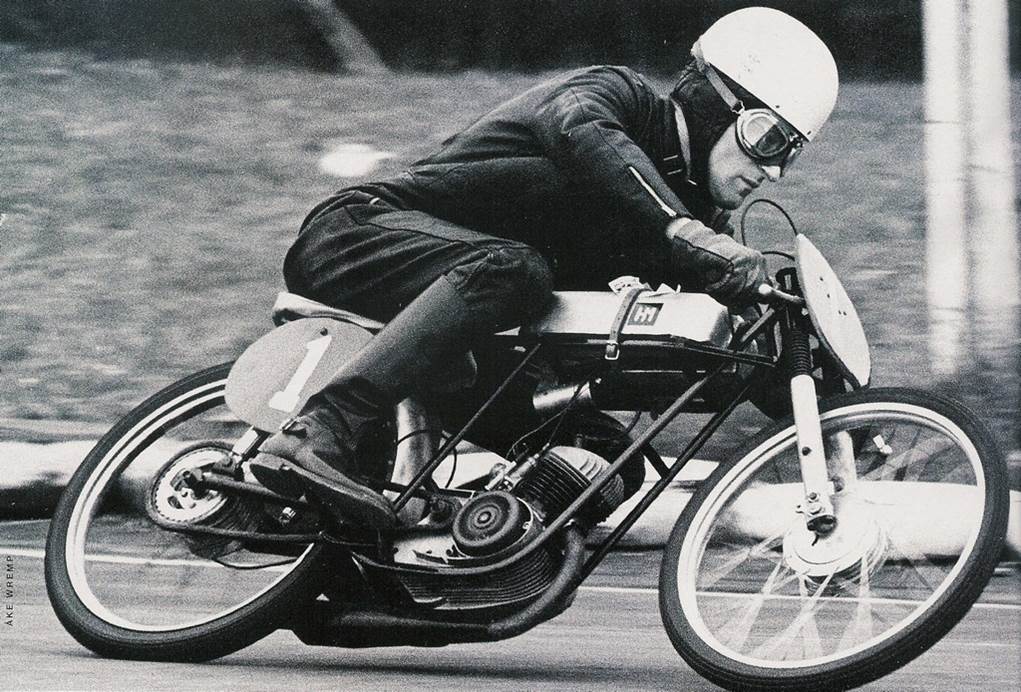
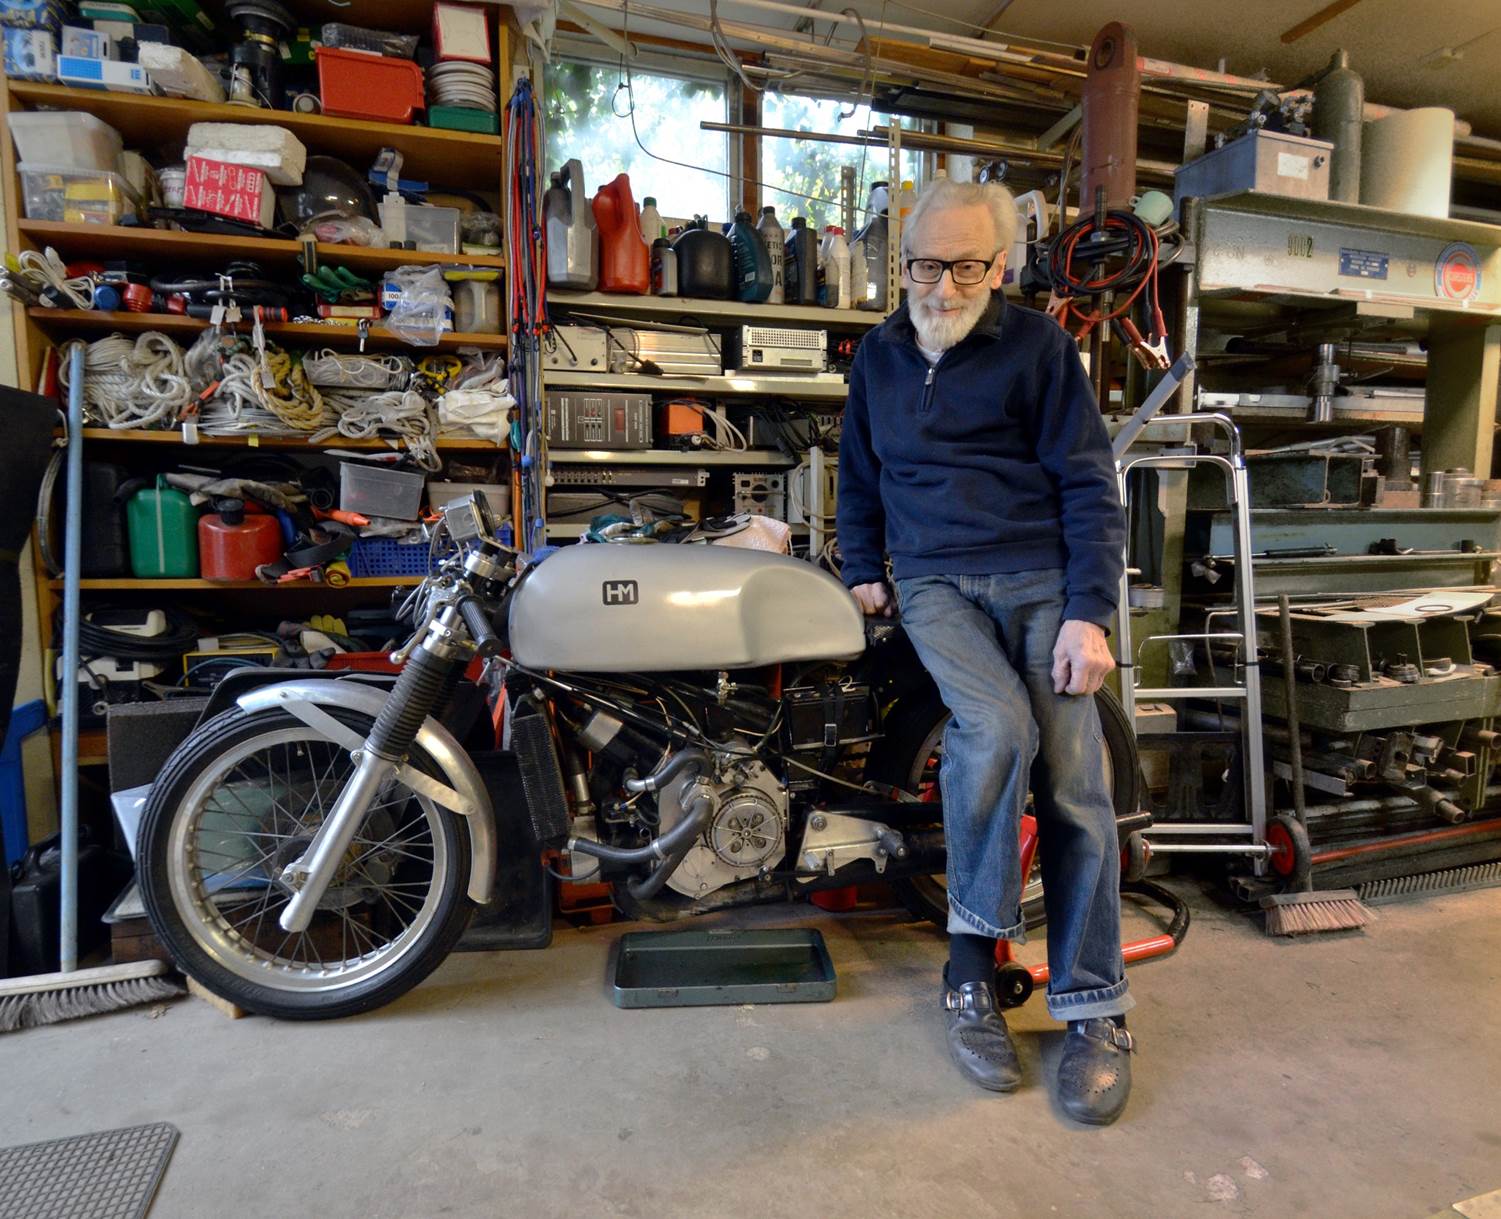
Sven built every size motorcycle, up to 500 cc. Below is with his 2-cylinder 500 cc two-stroke that took points in the World Championship in the late 1960s. All his motorcycle’s wore the brand “HM” (Hakansson Motors), which you also can see on the nose of the KillaJoule.
Just like I am not alone in my racing, my dad wasn’t alone in his racing effort. My mom enjoyed the life at the track, and was his mechanic when needed. For a while they ran a motorcycle dealership together. She was on the cover of the local newspaper as “Sweden’s Miss Motorcycle”.

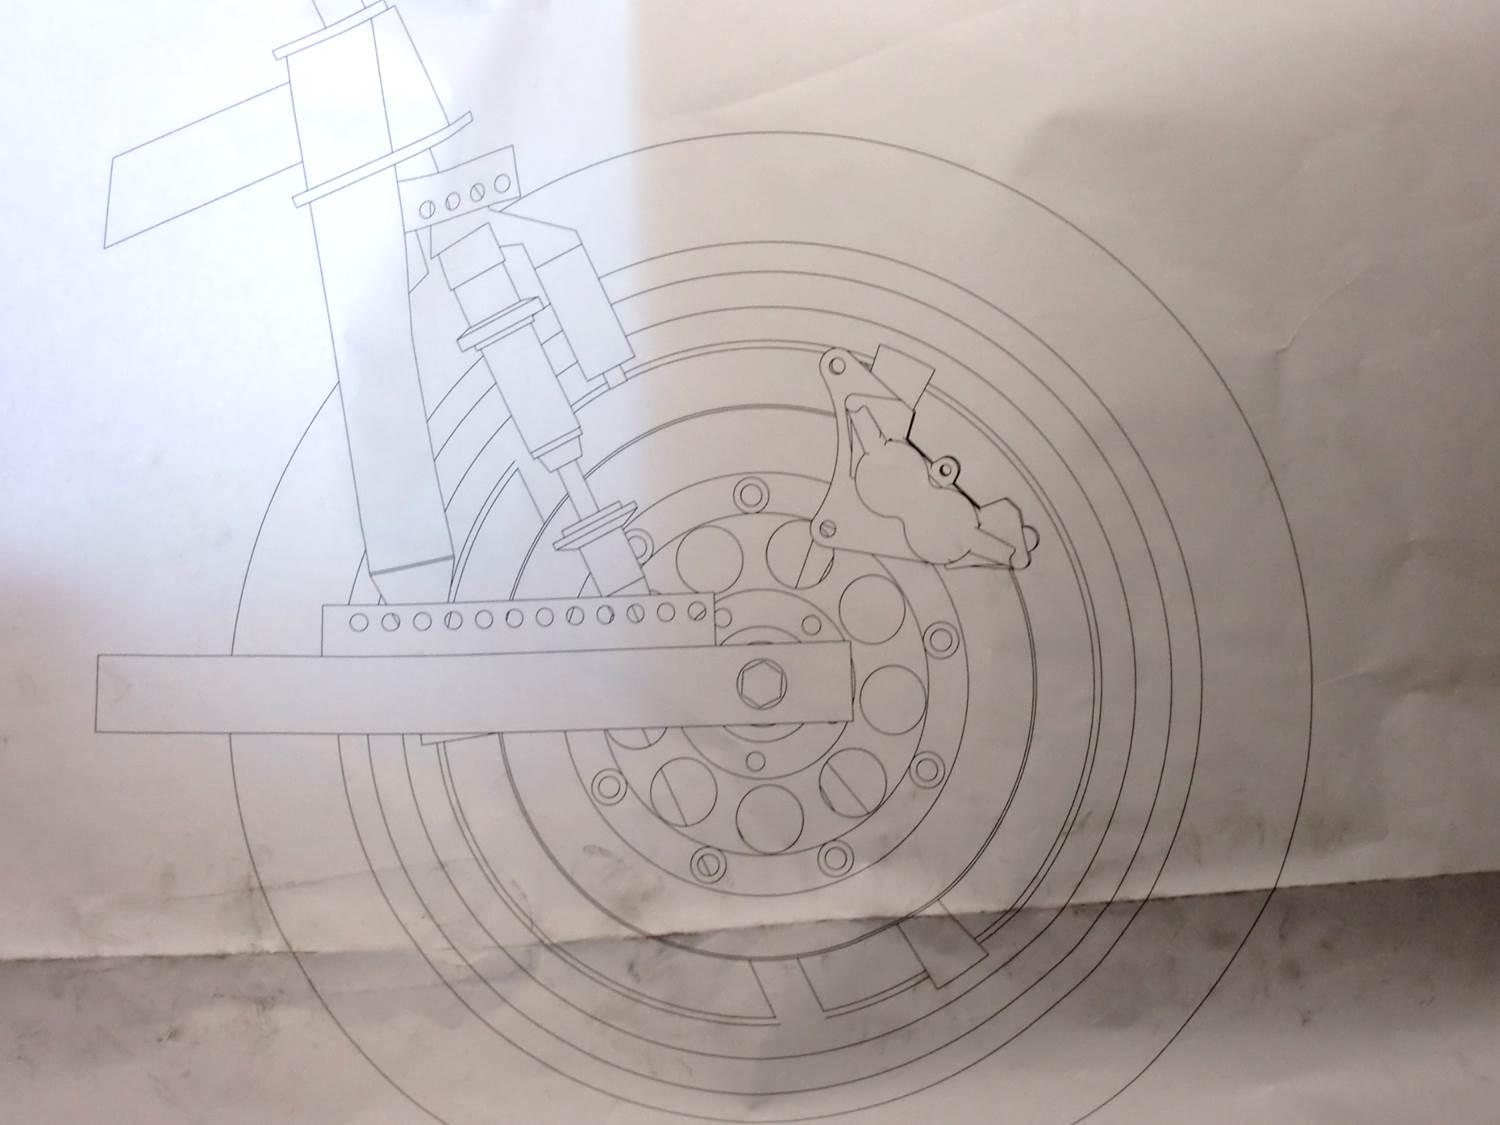
But I digress, let’s get back to the KillaJoule. I needed help with the design of the front end and called my dad. A few days later he sent me this drawing.
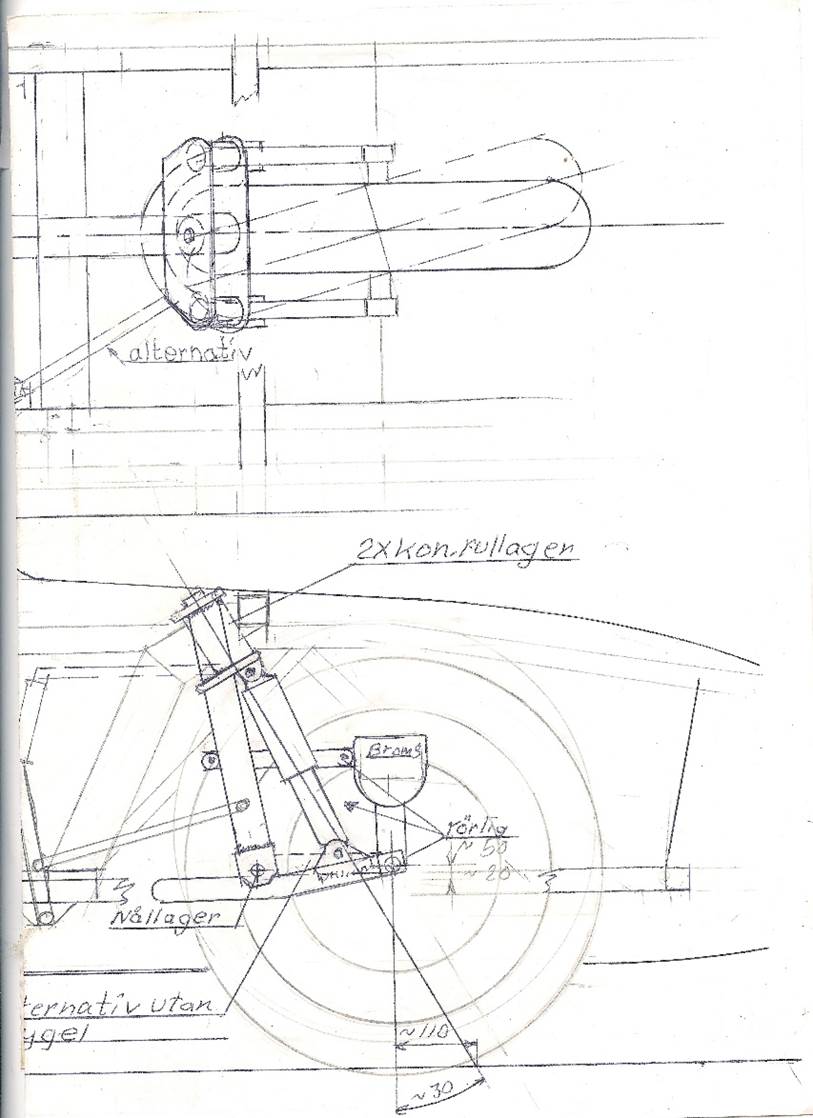
And then he sent an additional drawing with a suggestion how to mount the brakes.

Bill jumped on the task and drew up my dad’s design in CAD (Computer Aided Design). Our software package of choice has always been Autodesk Inventor, but there are many different software packages to choose from (learn more about CAD here). 
This was one of the first computer-generated images of the KillaJoule. 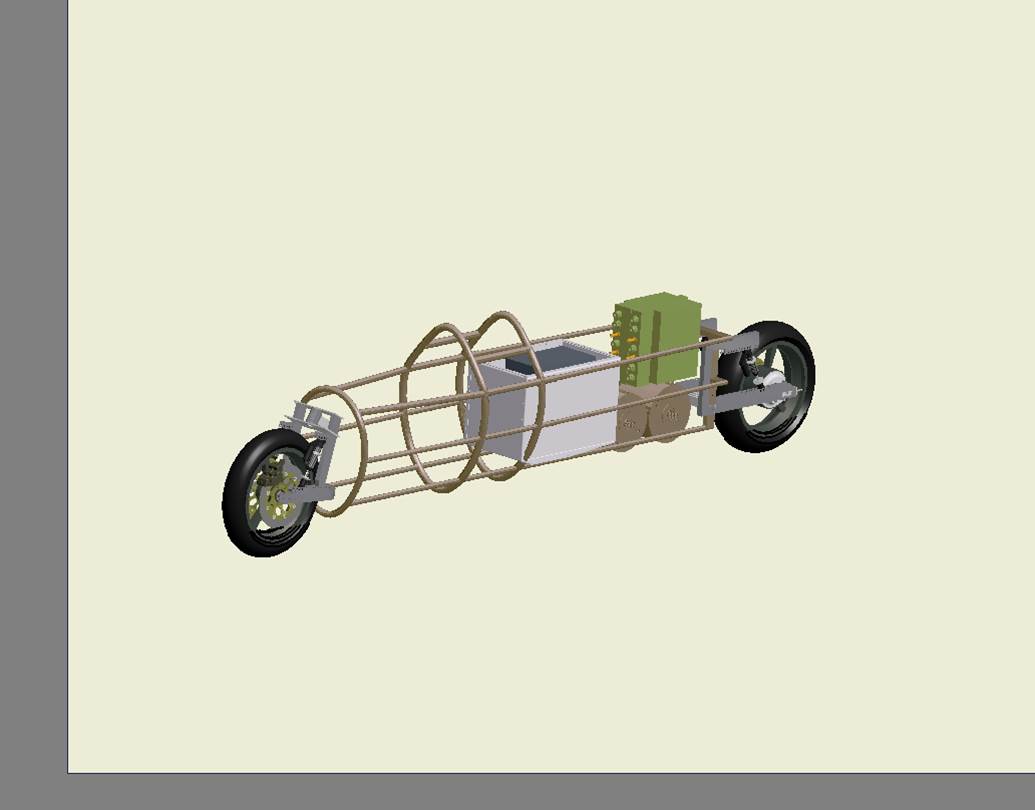
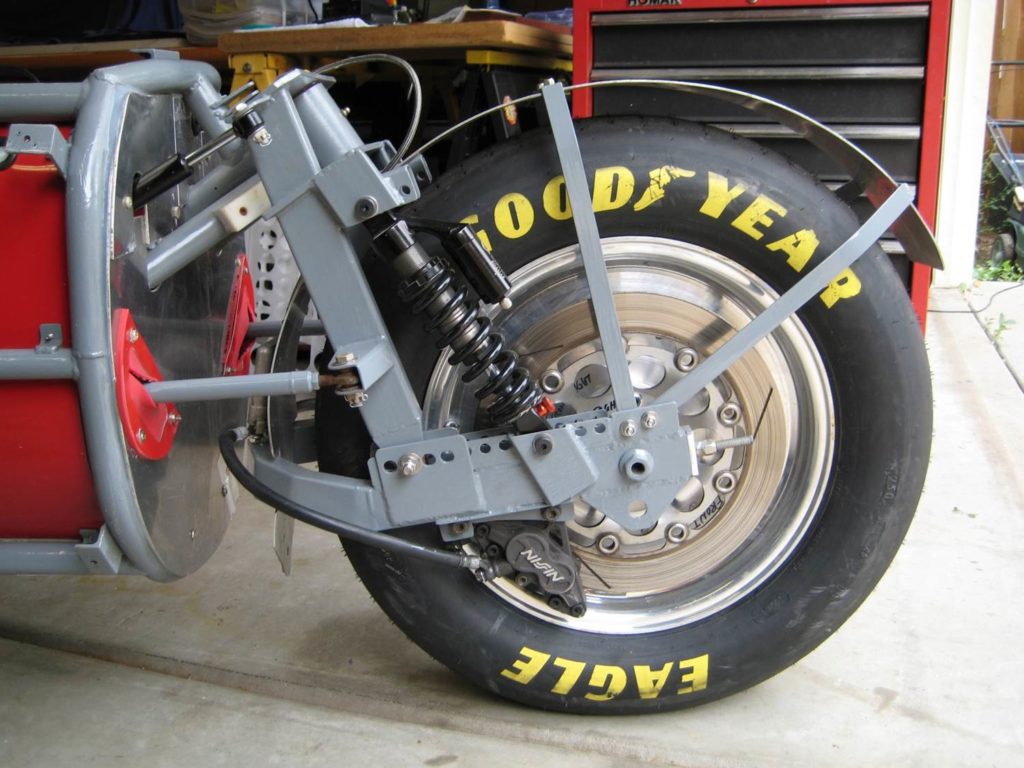
Bill had to draw all the components of the front suspension, including the shock absorbers (note that the spring is not included, it was difficult to draw and not needed in the CAD drawing). 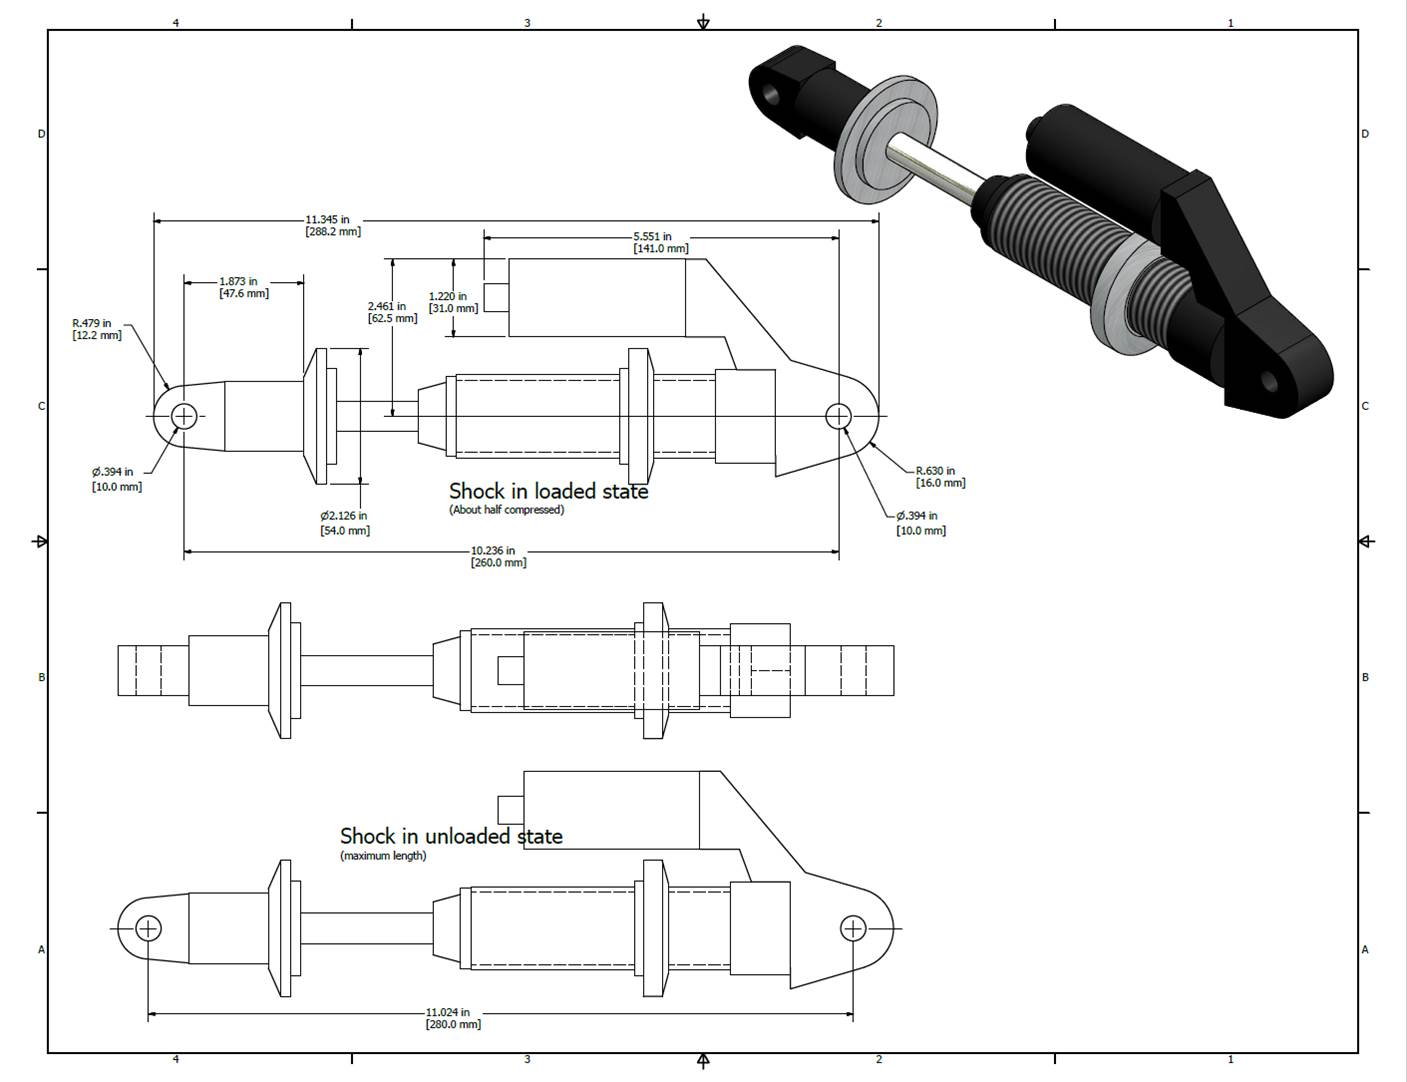
In this image you can see how incredibly low the whole design is – it only sticks up about 10 cm (4 inches) above the front tire.
Another early image that also featured the logo of University of Denver, where I did my engineering degree. University of Denver never officially sponsored the KillaJoule, but they were generous with giving me time off to go racing. University of Denver’s colors are crimson (wine-red) and gold. The plan was to paint the KillaJoule in these colors, and the marketing department had promised to pay for the paint job, but when it was time to paint it, suddenly there was no money for it. Bill and I quickly decided to instead making it bright red, because we could get pre-painted aluminum sheet metal of that color. Also, you can never go wrong with a red racing vehicle! 😉 
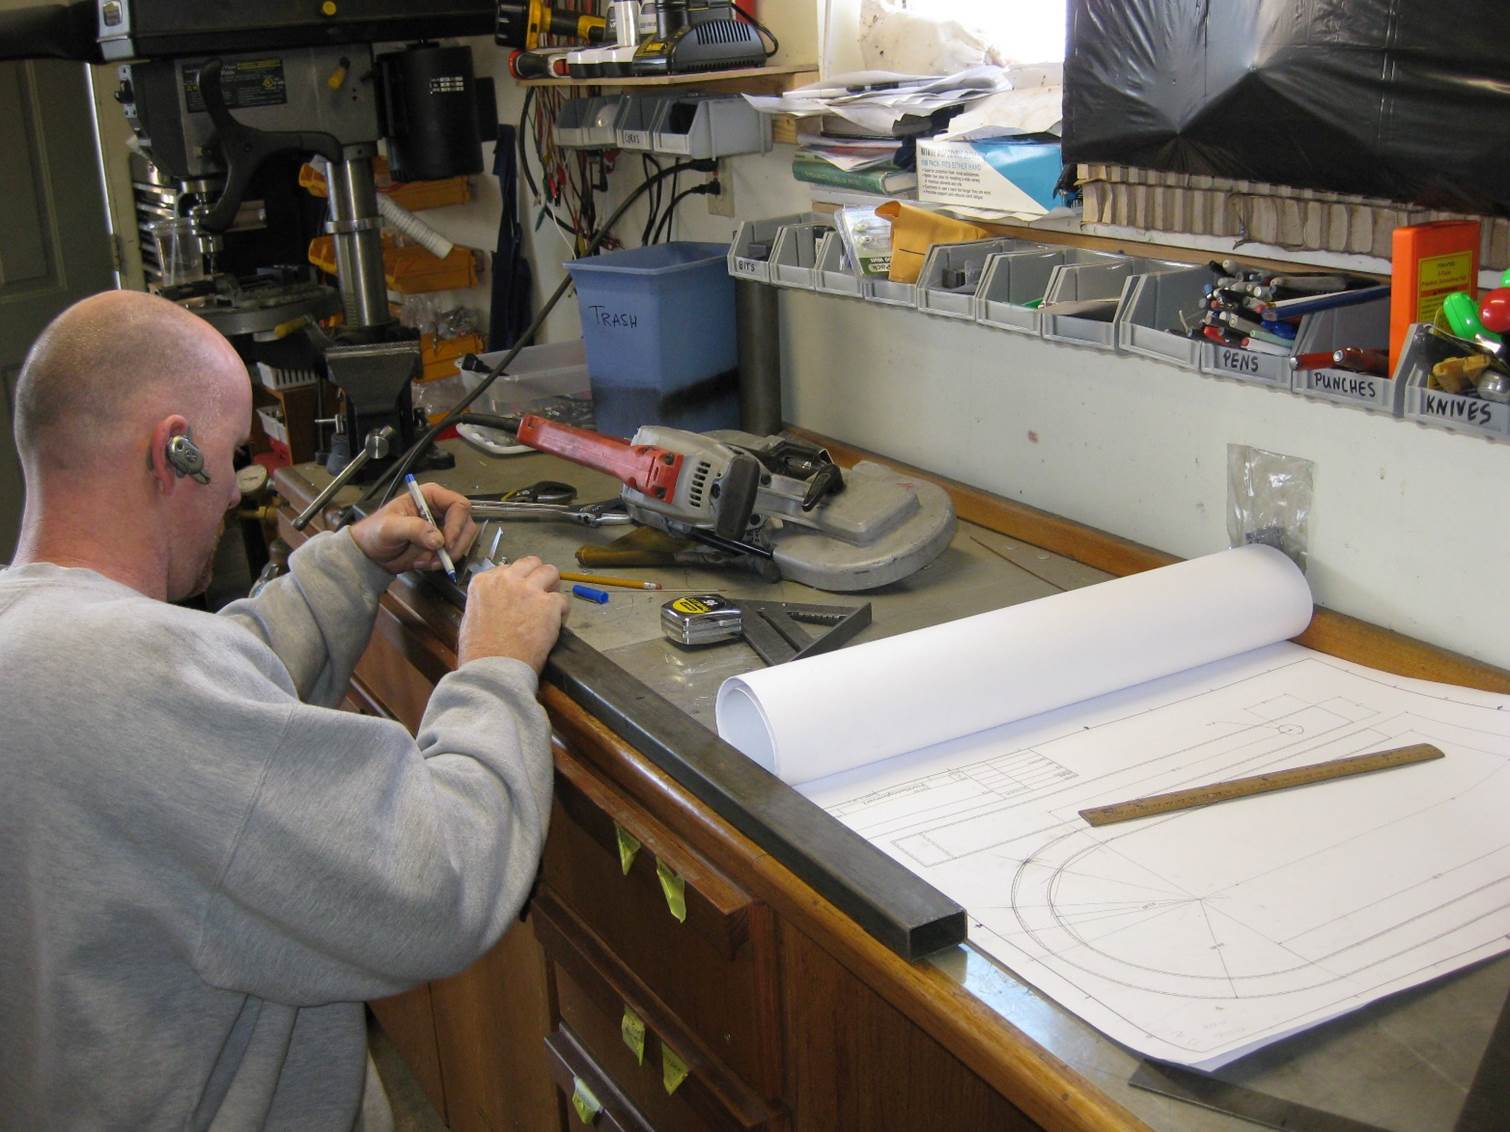
Anyway, enough about paint, let’s get back to the suspension. One of the huge benefits of designing things in CAD us that you can quickly generate technical drawings. To use as guidelines for the construction, we printed the drawings in full size (1:1 scale). Here is the entire suspension assembled:
We also printed drawings of the individual components. Here is Clay Gardiner marking up the rectangular tubing that will become the front swingarm. You can see the full-size drawing to the right in the photo.
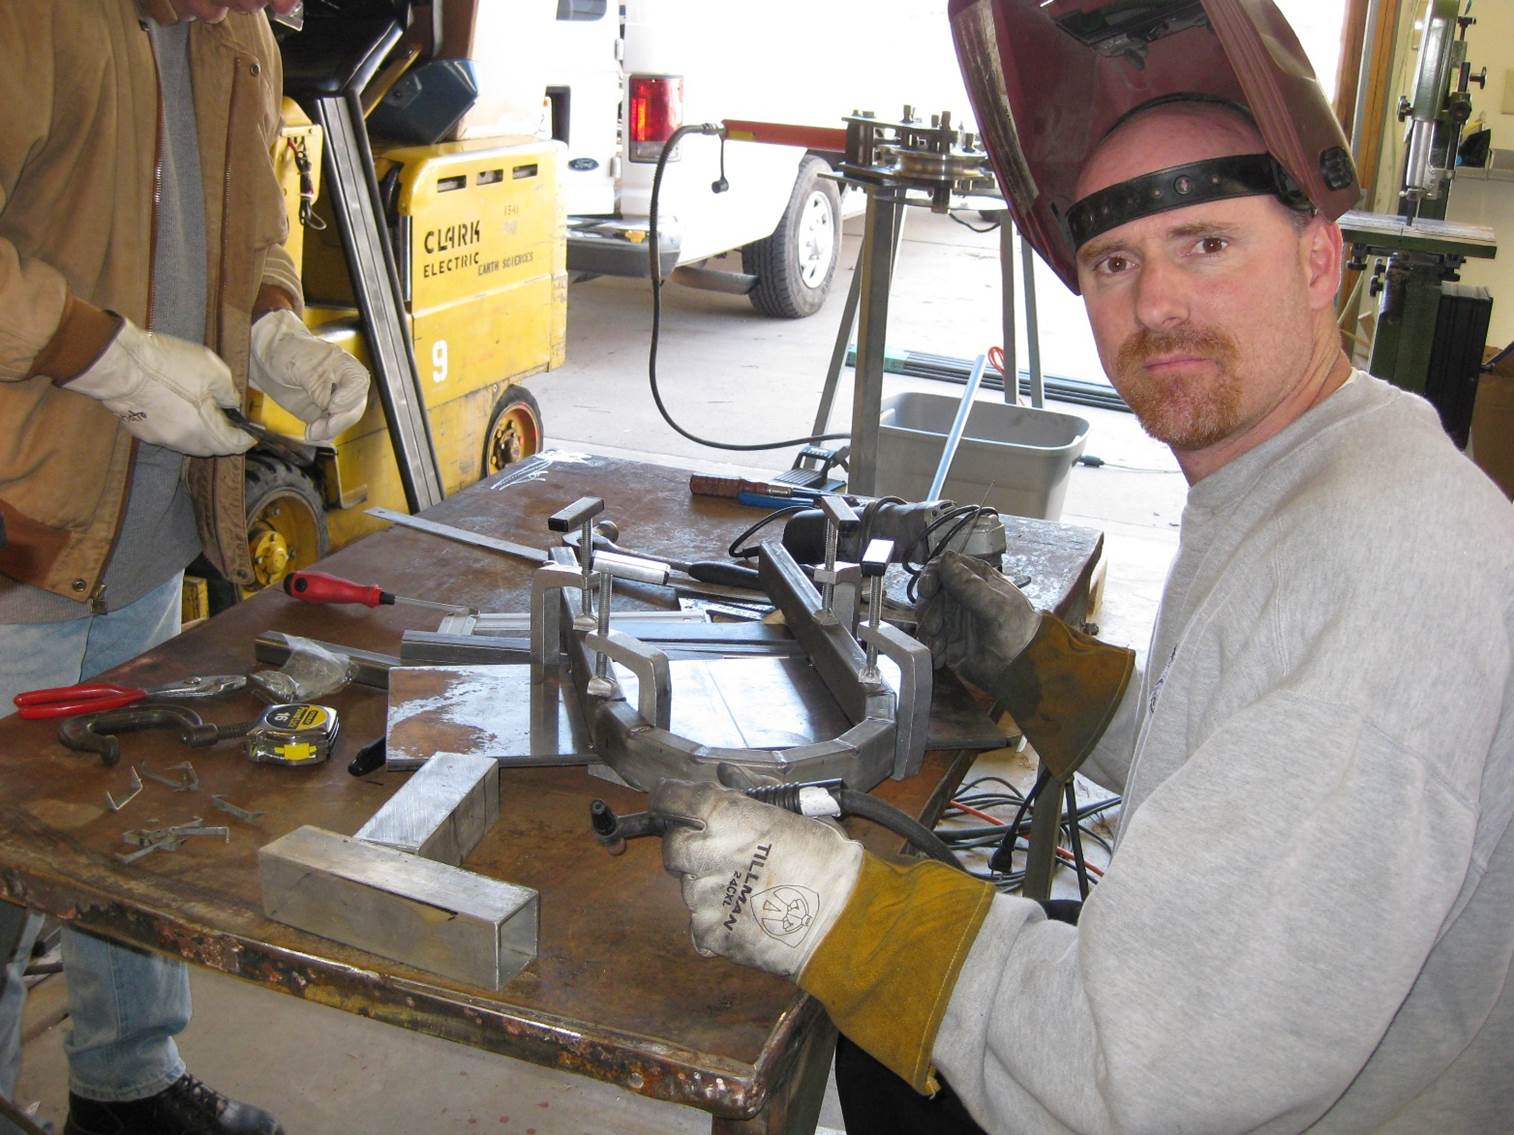
TIG welding of the front swingarm by Clay Gardiner. Clay’s uncle Gary Gardiner helped out as well and is seen to the left in the photo.
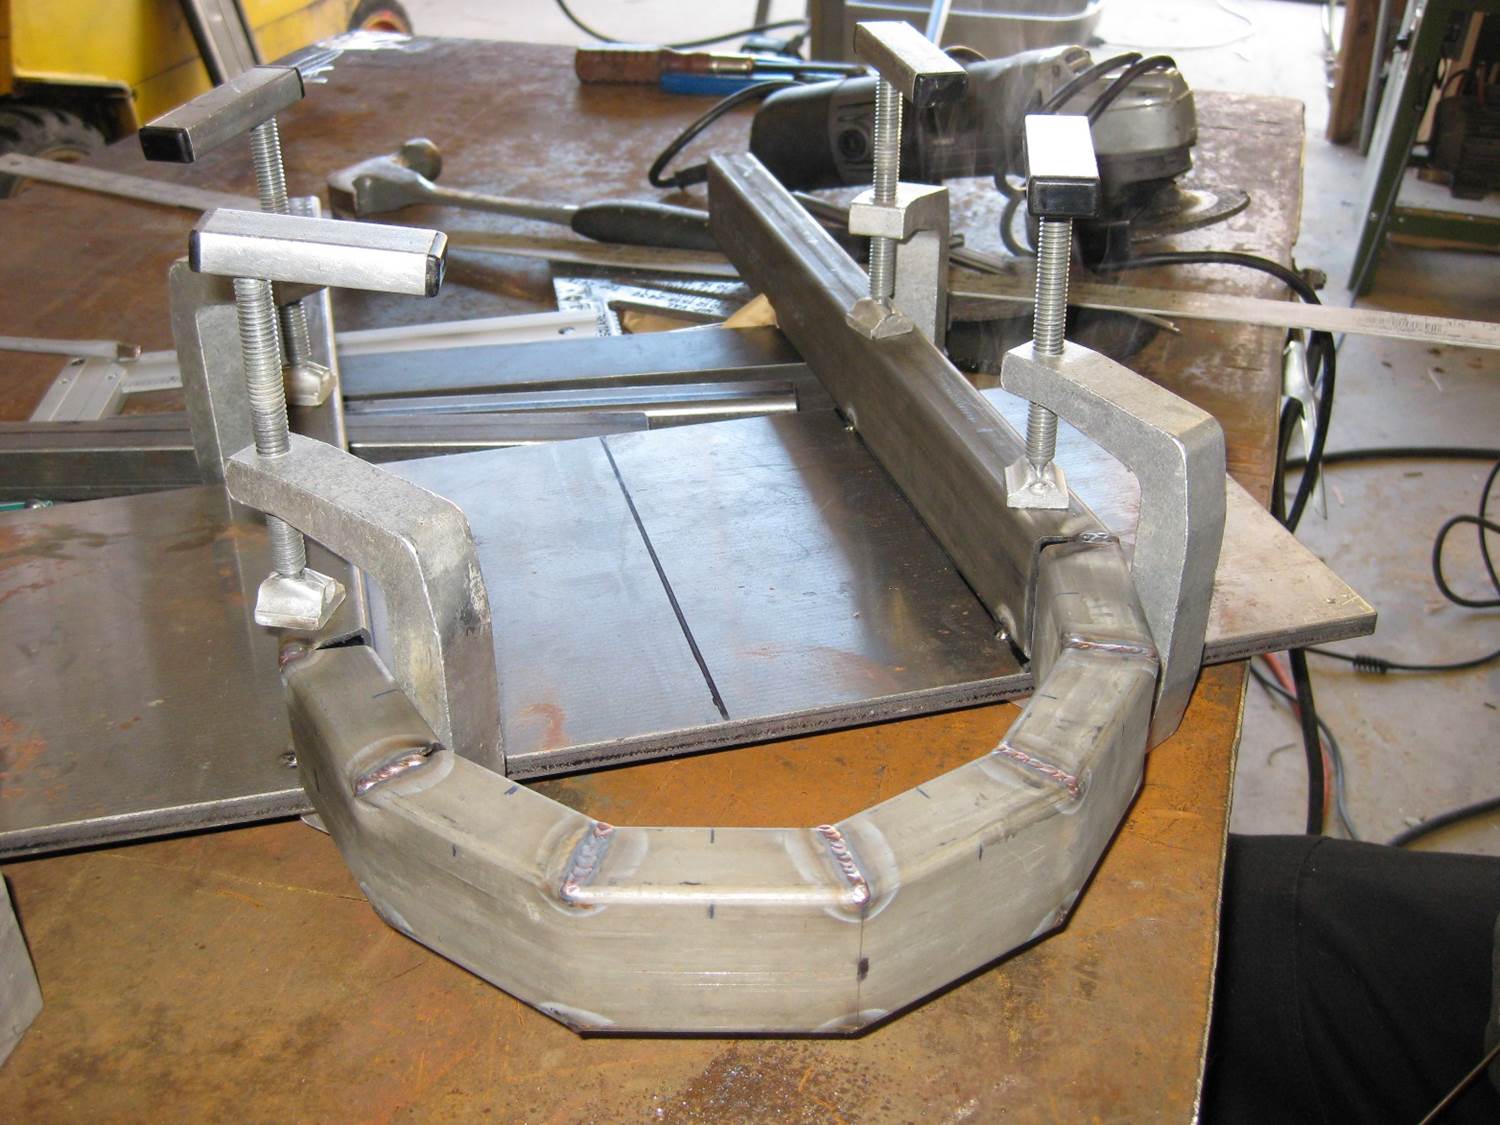
Clay’s outstanding welding up close (you can read more about TIG welding here).
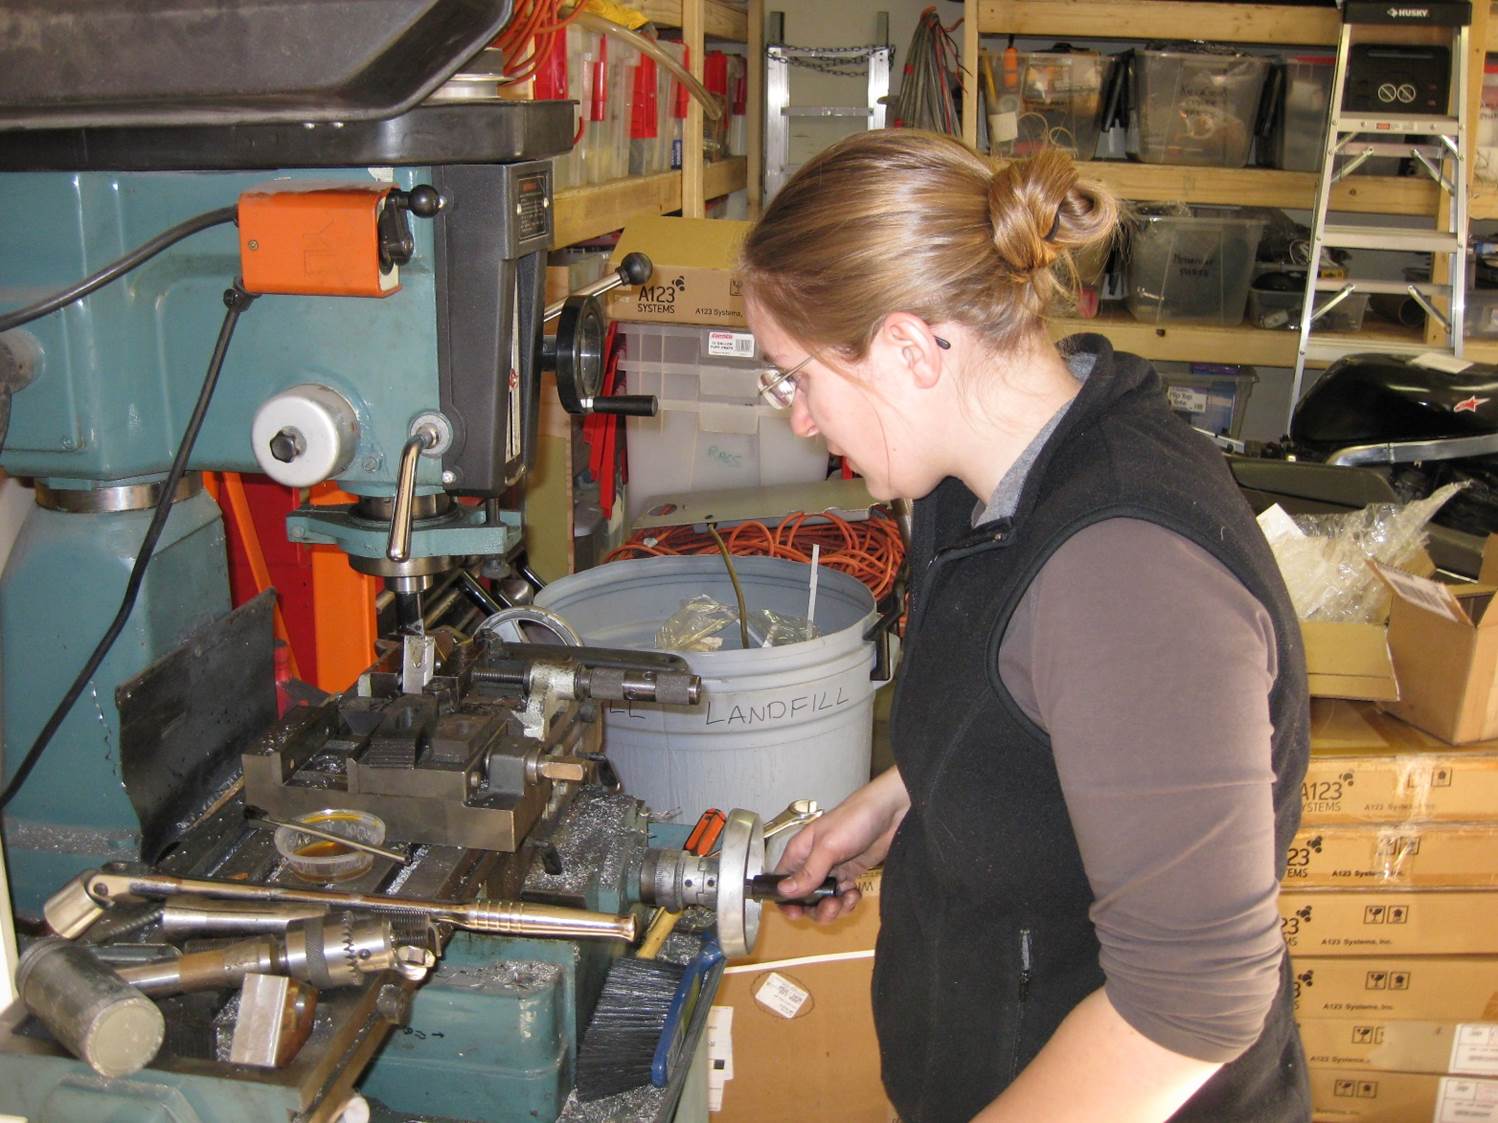
While Clay was welding, I was machining other parts on the milling machine. Note that my long hair is put up in a bun – something that is very important when you work with powerful, rotating machines such as a milling machine (read more about how to stay safe in the workshop here).
Another great thing with full-sized drawings is that you can cut out the component from the drawing, tape it to your material, and cut out the metal like you make a paper doll! Using this strip with all the circles, I could quickly and accurately make the adjustment rails that you can see in the next photo. 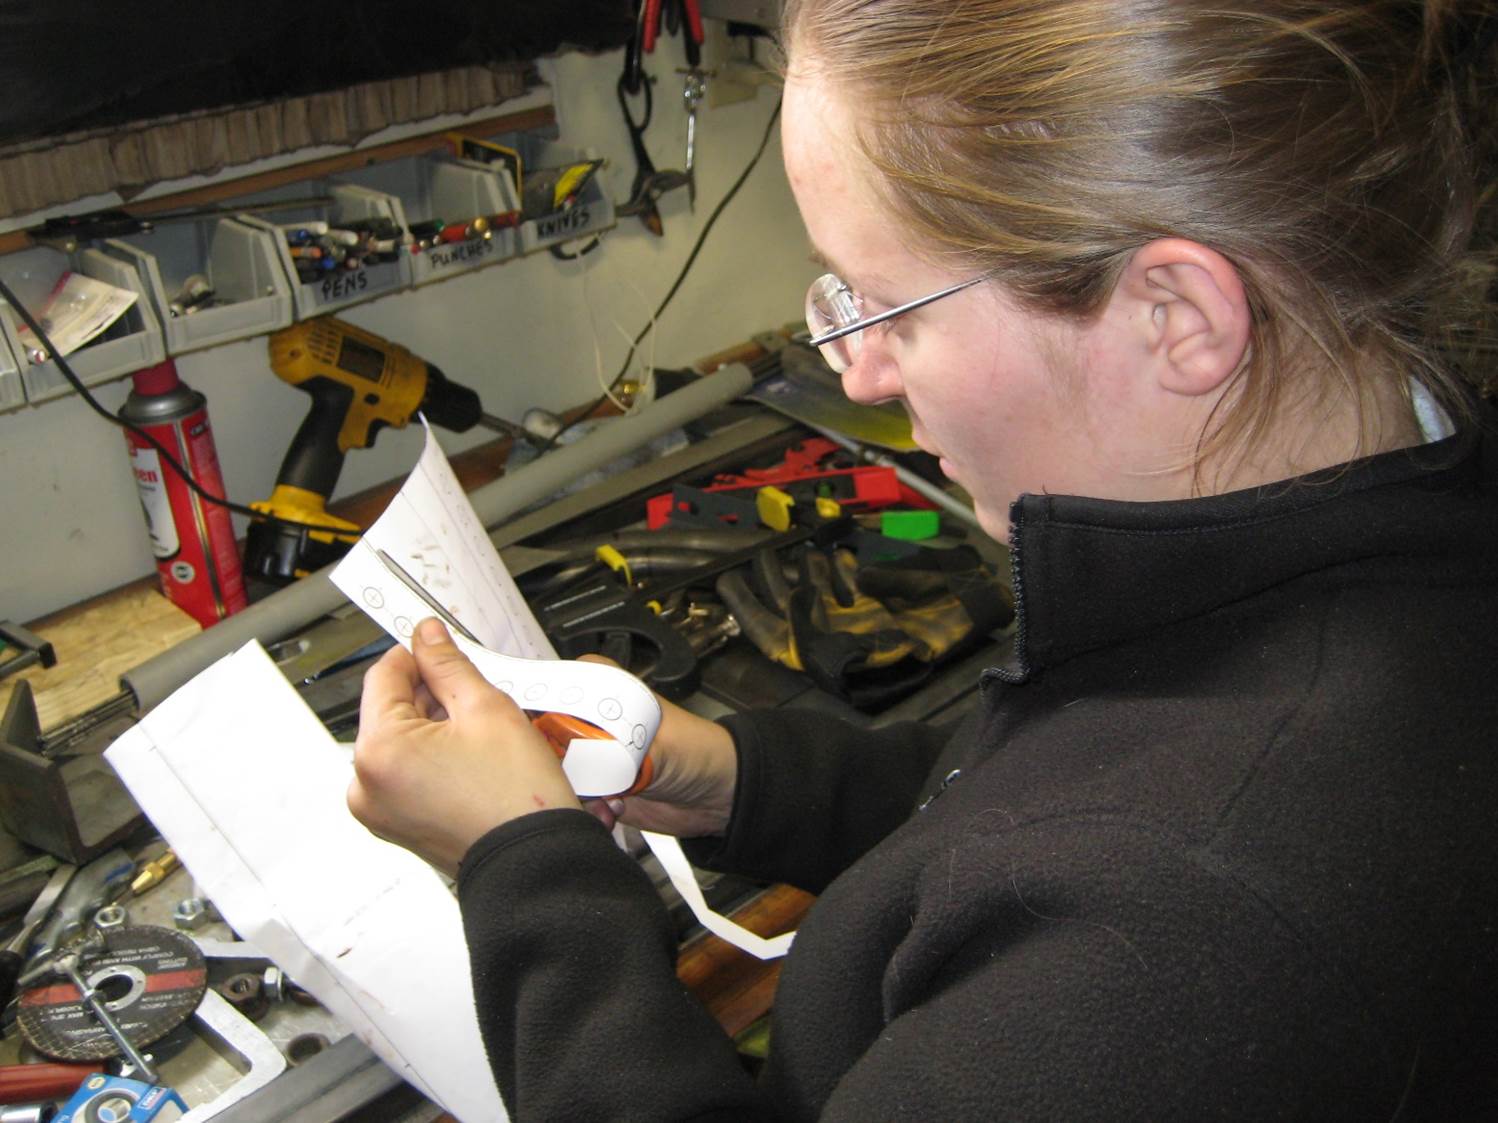 This is starting to look like a front suspension…
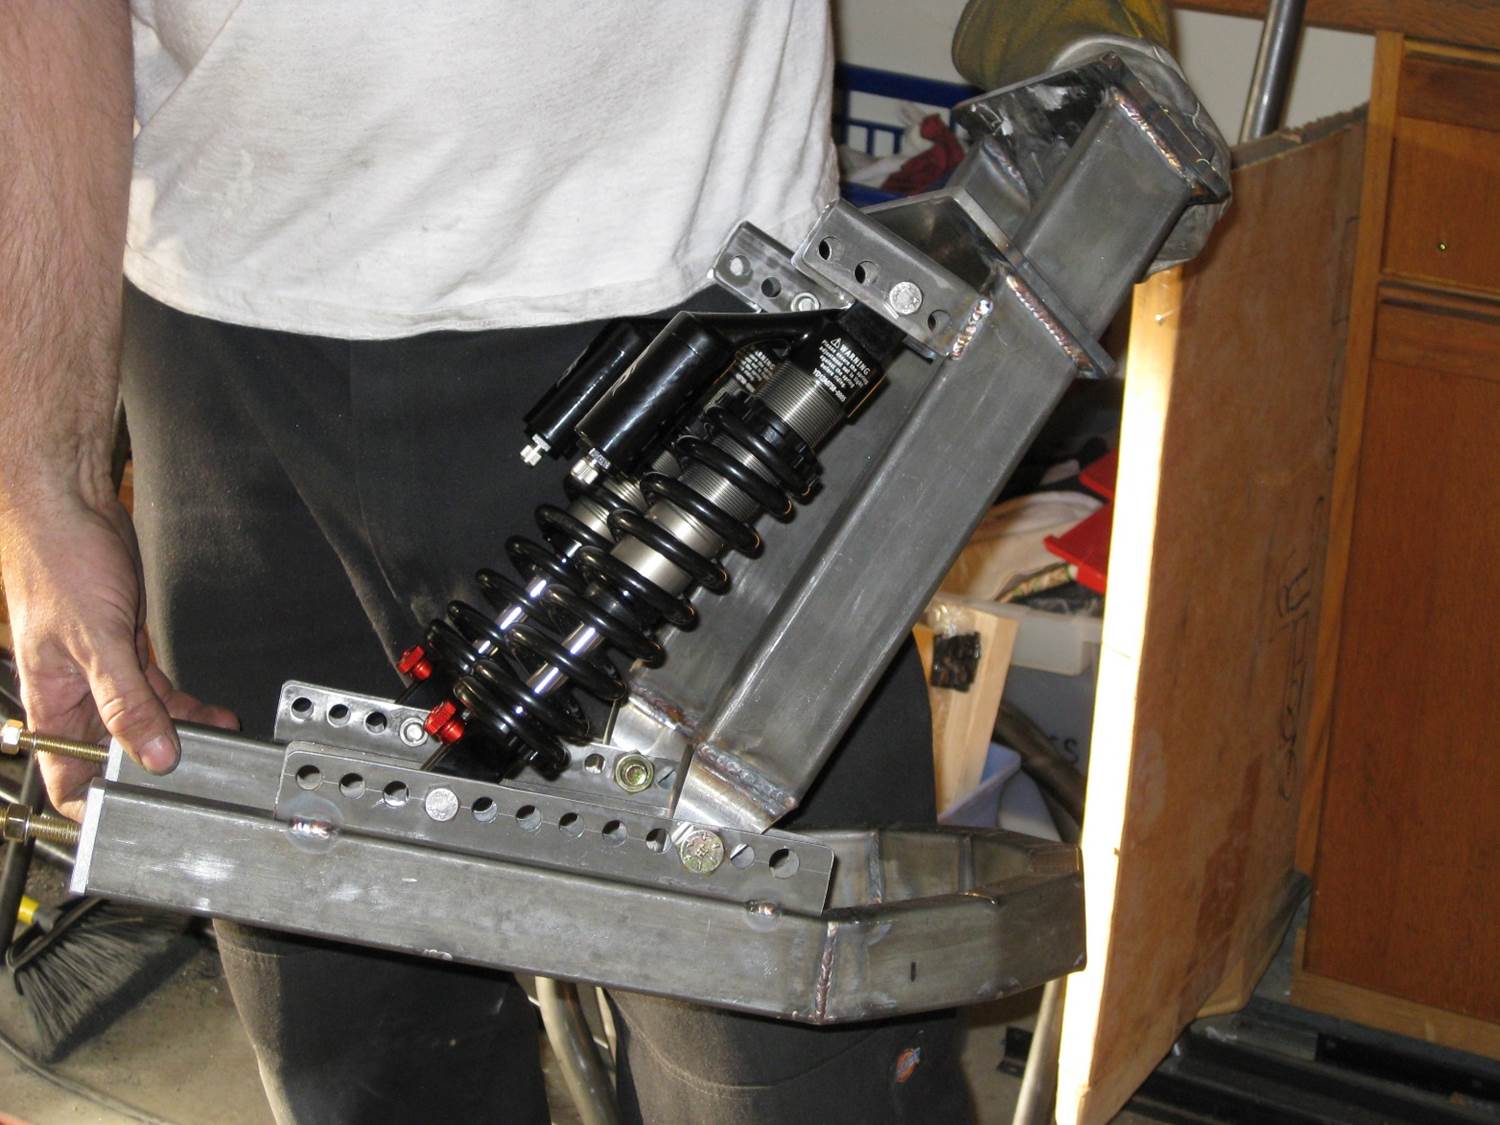
…but what are we doing now…? There are quite a few photos with me standing or sitting with my arms crossed, and appearing to staring straight into the air. I may be staring, but I am not just being lazy – I am thinking. And I am thinking hard!

After four intense days, we had a chassis for the the KillaJoule! 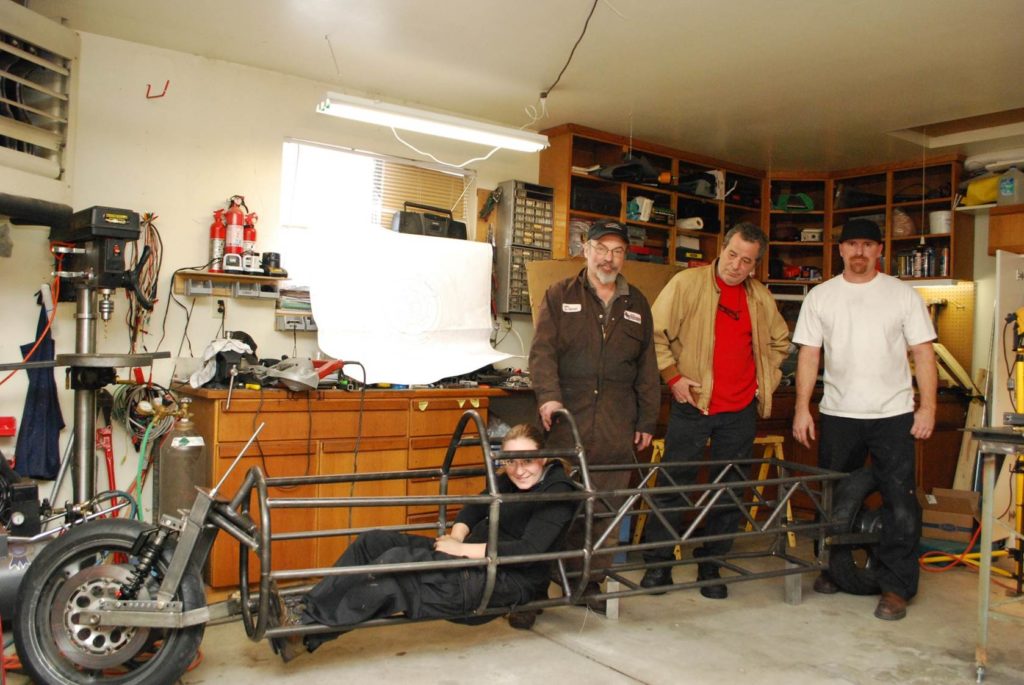
I took a first “test ride” on the welding table! 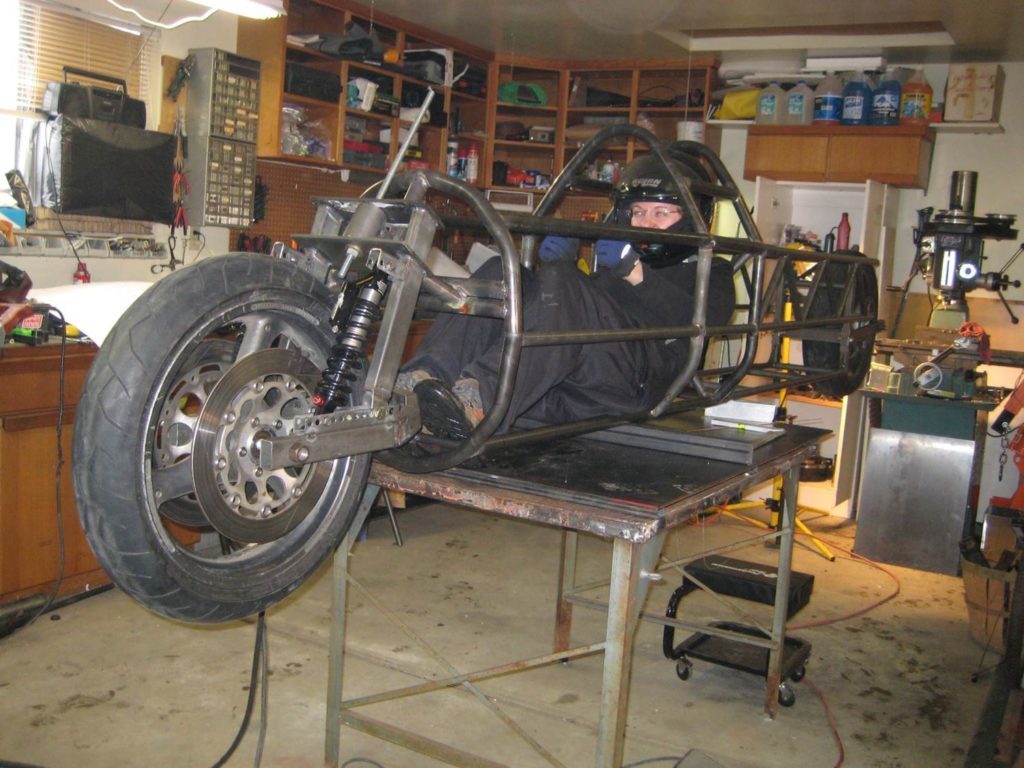
Here with a bit of paint and a fender. 
The first real test ride – around the block on an early Sunday morning! 
First time on the salt – August 2010! 5 months after we cut the first steel tubes. The powertrain worked great, but the steering was too heavy and I couldn’t keep it upright. I called my dad again and asked for advice again about the steering. 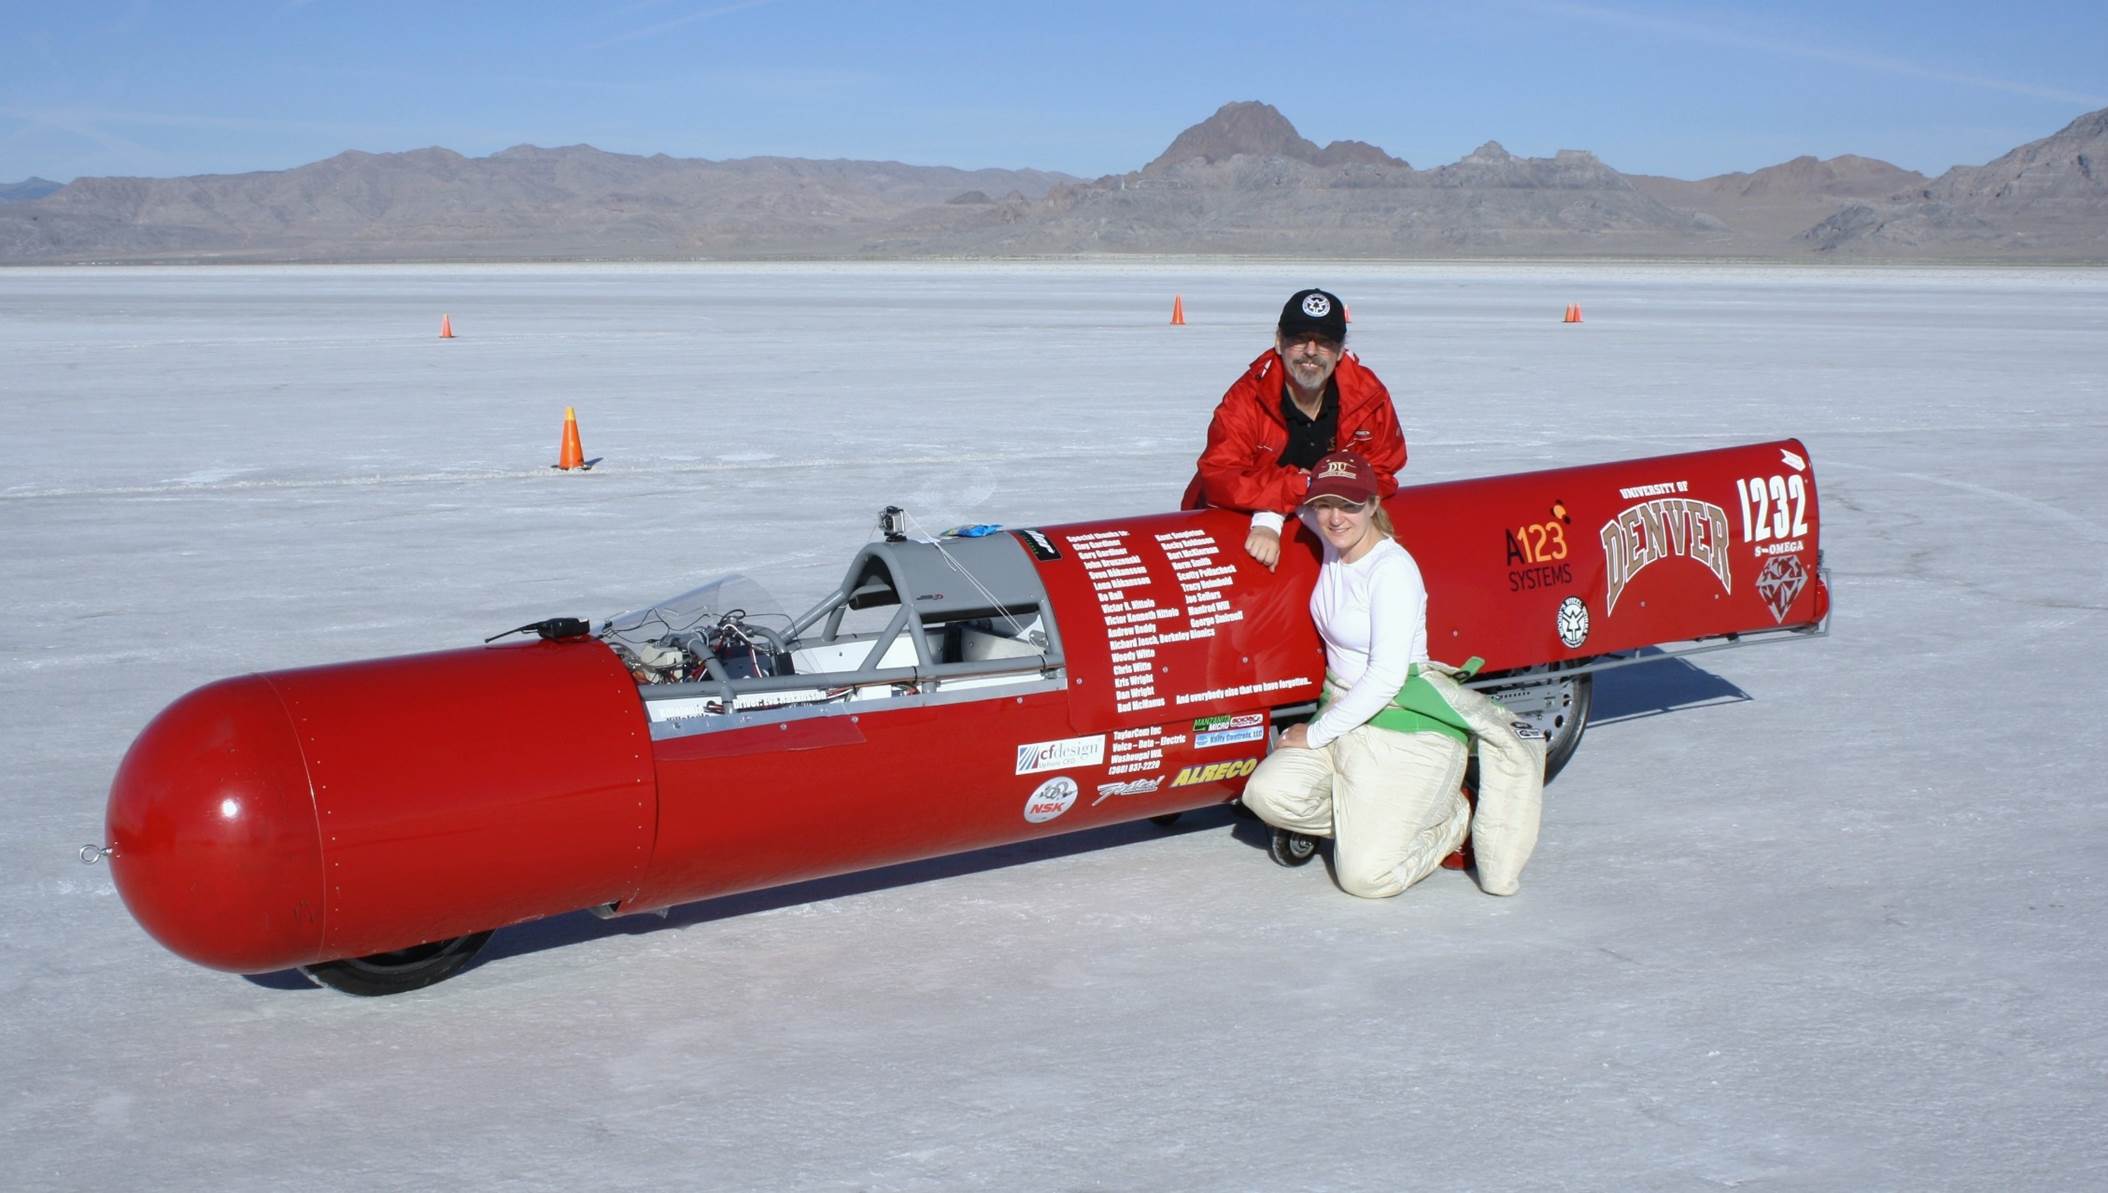
A few days later, he sent me another drawing! The work was cut out for me for the winter of 2011.
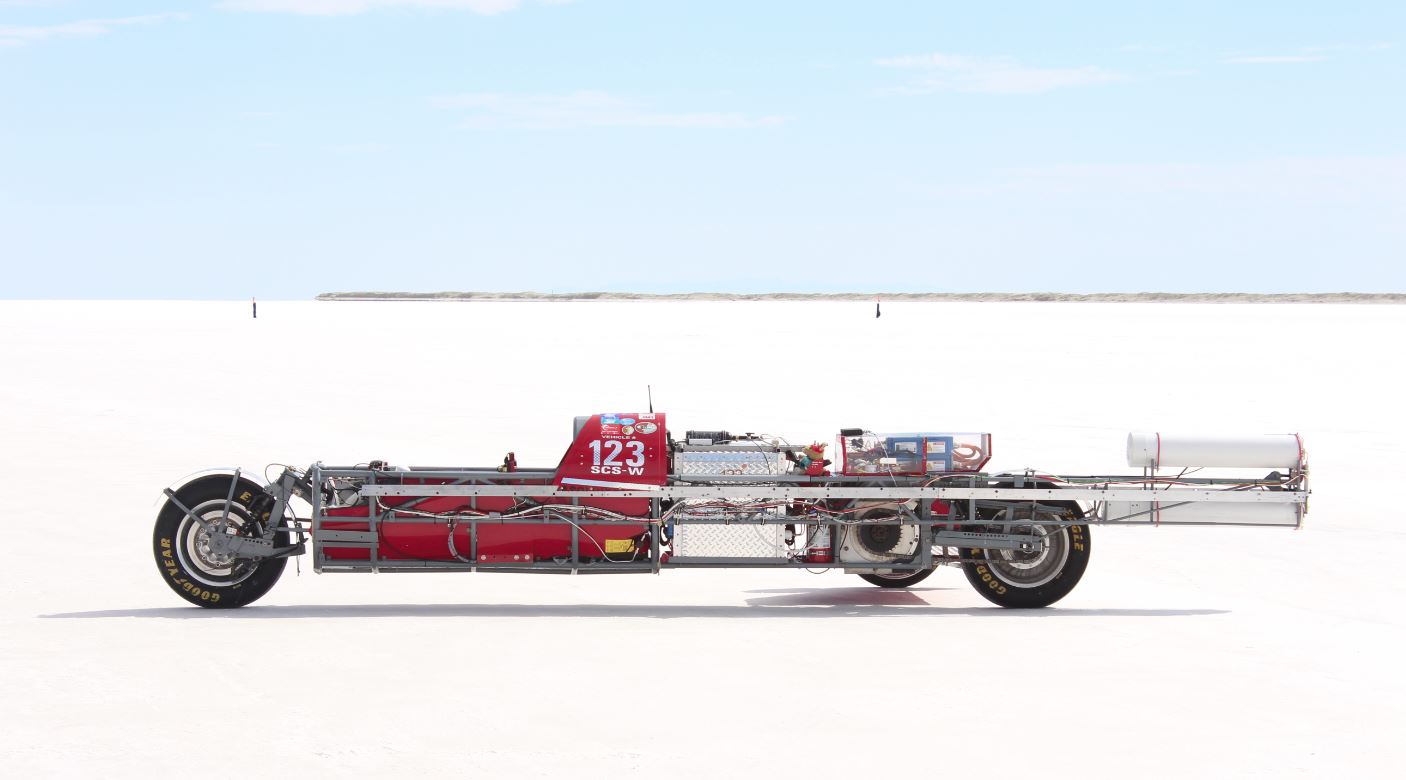
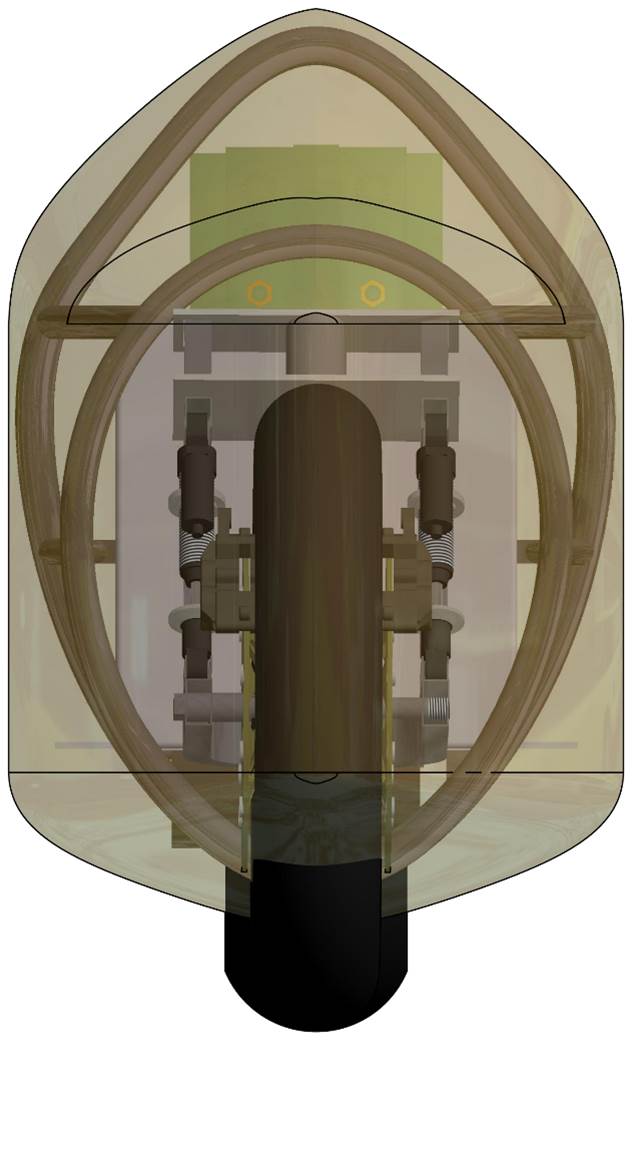
Big changes happened during the winter of 2011. It wasn’t only the steering that had to be improved. The balance problems had to be solved, the cockpit needed to be lengthen and the bodywork had to be improved. Jim Corning at NovaKinetics Aerosystems in Flagstaff, Arizona, USA came to our rescue, but I will tell you that story another time. For now, enjoy the finished KillaJoule front end as it looked in 2017. Perhaps a bit odd looking, but it works great! Below is an “X-ray” picture showing everything under the skin of the KillaJoule!
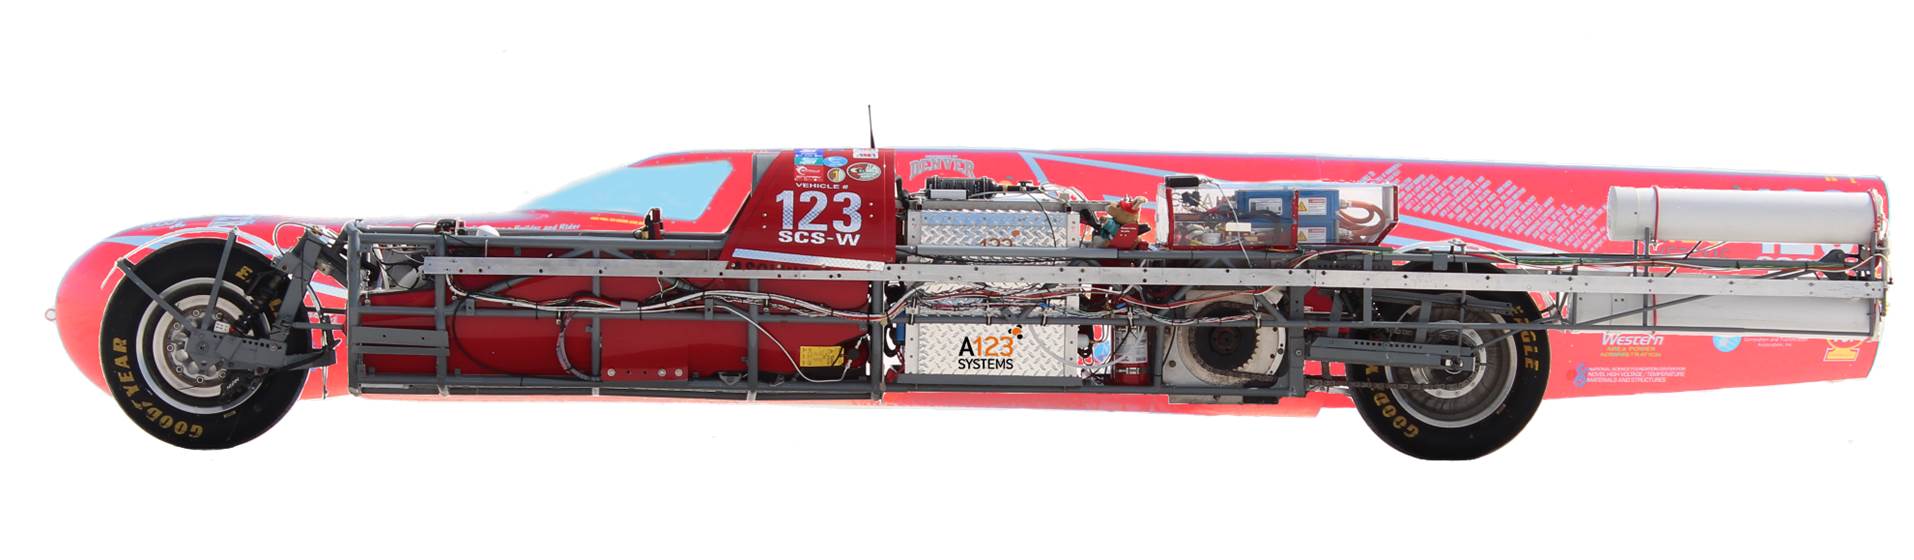
KillaJoule under the skin!
This post is an excerpt from the page “Under the skin”, that is dedicated to the details of the KillaJoule. To get the latest news, go to that page.