Posted July 6, 2018
I have a growing collection of 3D printers, but I am also looking for printers that will suit people with a tighter budget. It looks like I have finally found one: Creality Ender 3!
I bought my Creality Ender 3 direct from AliExpress after reading this review by All3DP. Prices and shipping cost may have changed since I wrote this, but when I bought mine in June 2018 it was US$ 208 with free shipping to most countries. I shortly thereafter bought one for my dad in Sweden as well. The price was the same, but it was shipped from Germany instead of from China. The link to the original AliExpress listing may still work (if it doesn’t, just search for it).
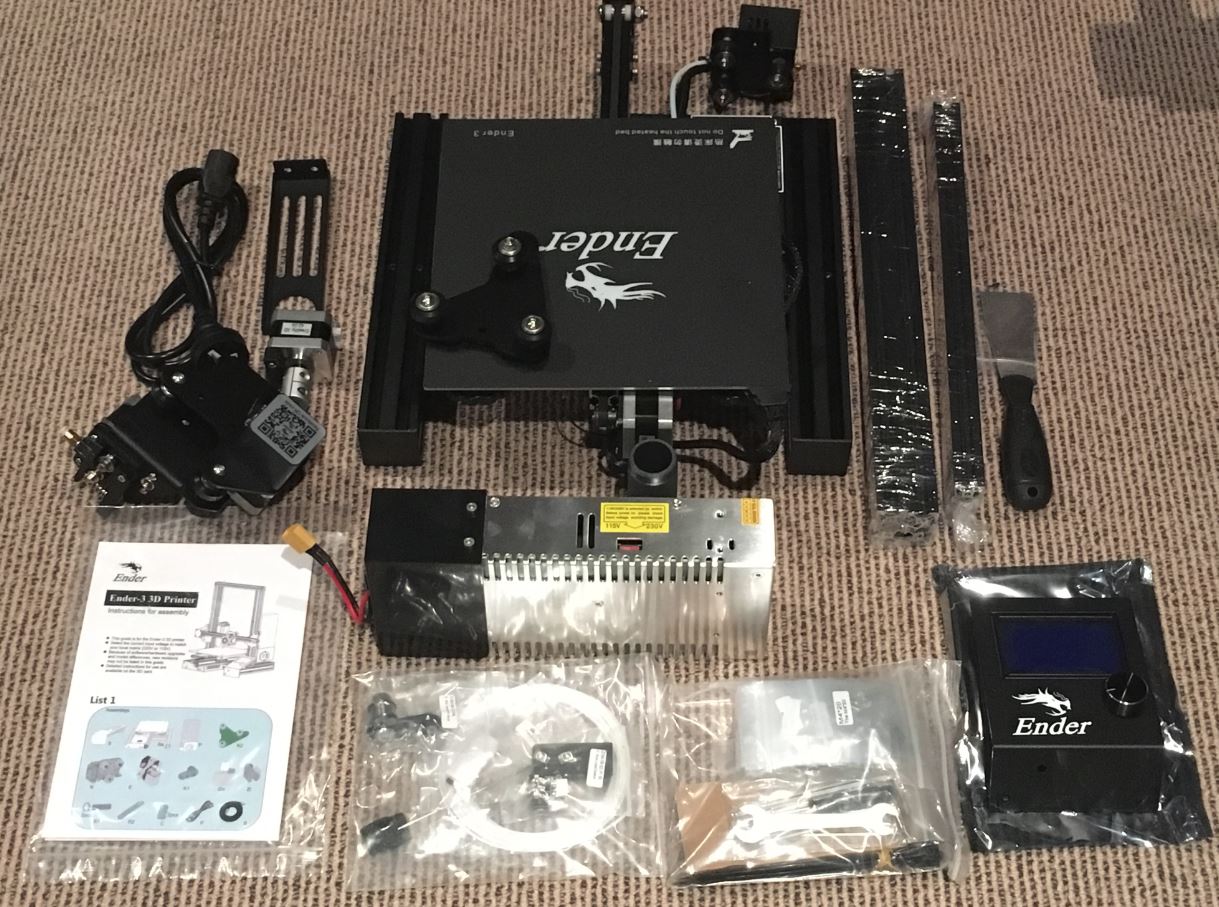
So, does it work? Yes, it works great. Is it as good as the Prusa or Lulzbot? No, it is not. The print volume is smaller and it doesn’t have automatic bed leveling. It is also noisier than the other two printers. Would I recommend it? Yes, absolutely. You get very much value for your money, and it is perfect starter if you are on a tight budget. If you have more money to spend, I would recommend the Prusa or Lulzbot (read more about these printer on my page about 3D printing). The Creality Ender 3 took about 2 hours to assemble. Most parts are already assembled.
Setup Creality Ender 3 in Ultimaker Cura
When I write this, Creality Ender 3 has not yet made it into the Cura slicer as a pre-setup option, but you can use the settings for Creality CR-10 with just some minor modifications. These settings were used for Ultimaker Cura 3.4.0. Things may have changed since this was published. Some of these settings were in a file on the SD card that came with the printer. Your printer may or may not come with files on the cards.
— WARNING! These instructions are provided “as is”. I cannot take any responsibility if your
printer breaks, stops working, or injure someone. No guarantee that it will work with your printer just because it worked with my printer! Use these instructions on your own risk! —
1) Download and install Ultimaker Cura (free): https://ultimaker.com/en/products/ultimaker-cura-software
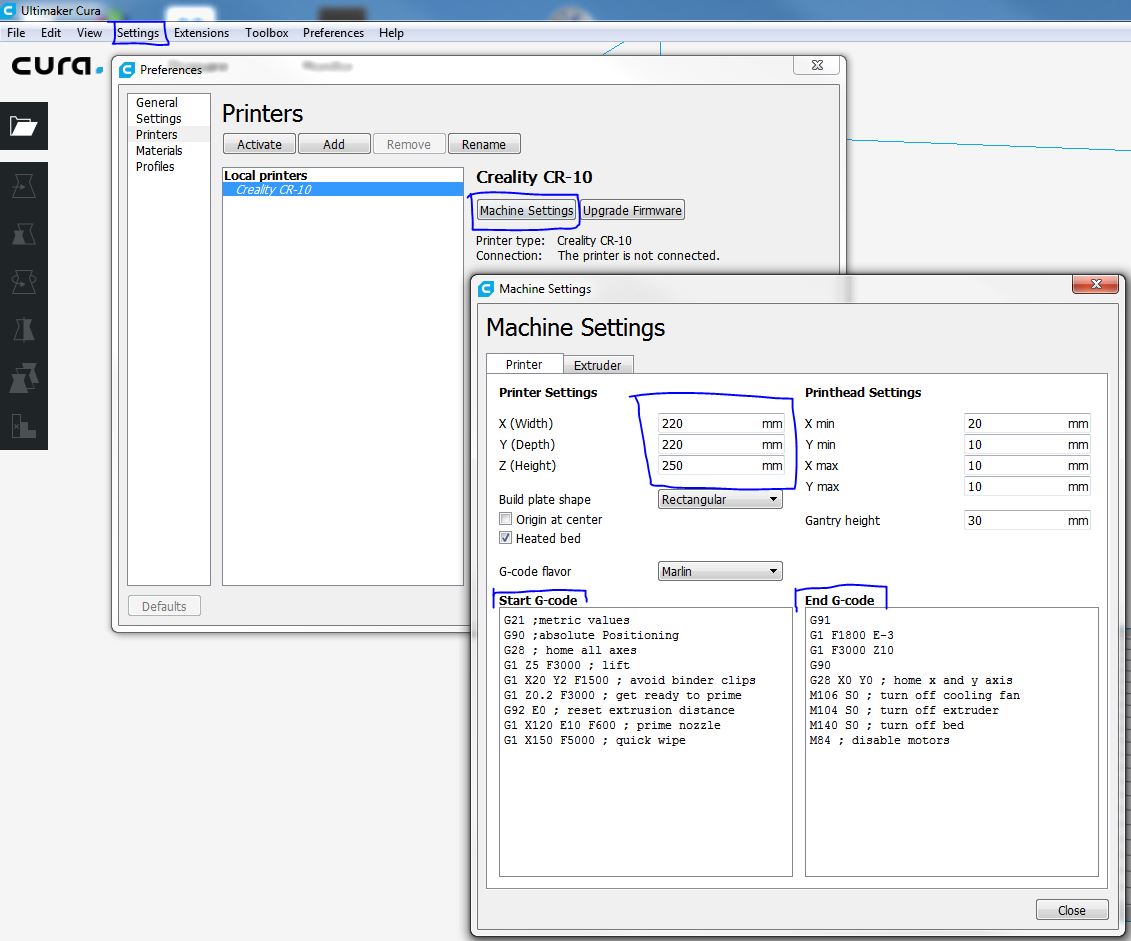
2) Select printer “Creality CR-10”
3) Go to Settings > Printer > Manage Printer > Machine Settings
a) Change bed size to the following:
X: 220 mm
Y: 220 mm
Z: 250 mm
b) Change the Start and End G-code to the following
(this code appears to work well, but if it doesn’t and you want to restore the settings,
the original code for CR-10 for Ultimaker Cura 3.4.0 is included below).
Copy-and-paste version below the image. Note: Don’t include the “— START CODE —” or “— END CODE —“.
— START CODE —
G21 ;metric values
G90 ;absolute Positioning
G28 ; home all axes
G1 Z5 F3000 ; lift
G1 X20 Y2 F1500 ; avoid binder clips
G1 Z0.2 F3000 ; get ready to prime
G92 E0 ; reset extrusion distance
G1 X120 E10 F600 ; prime nozzle
G1 X150 F5000 ; quick wipe
— END CODE —
G91
G1 F1800 E-3
G1 F3000 Z10
G90
G28 X0 Y0 ; home x and y axis
M106 S0 ; turn off cooling fan
M104 S0 ; turn off extruder
M140 S0 ; turn off bed
M84 ; disable motors
ORIGINAL CODE FROM ULTIMAKER for Creality CR-10 (different printer from the same manufacturer)
— START —
G28 ;Home
G1 Z15.0 F6000 ;Move the platform down 15mm
;Prime the extruder
G92 E0
G1 F200 E3
G92 E0
— END —
G91
G1 F1800 E-3
G1 F3000 Z10
G90
G28 X0 Y0 ; home x and y axis
M106 S0 ; turn off cooling fan
M104 S0 ; turn off extruder
M140 S0 ; turn off bed
M84 ; disable motors
6) Where to start? If you have no clue where to start with your slicer settings, you can try to use the empty project found here (.zip file: Download, then right-click and select “Extract All” to get to the file). Open Cura and then select “Open File(s)” and select the extracted file. If prompted, select “Open as project”.
To import an STL file into your empty project, click the folder icon to the left on the screen.
If you don’t know what to print, check out Thingiverse.com or MyMiniFactory.com; there are literally thousands of 3D designs available for free.
7) Happy printing!
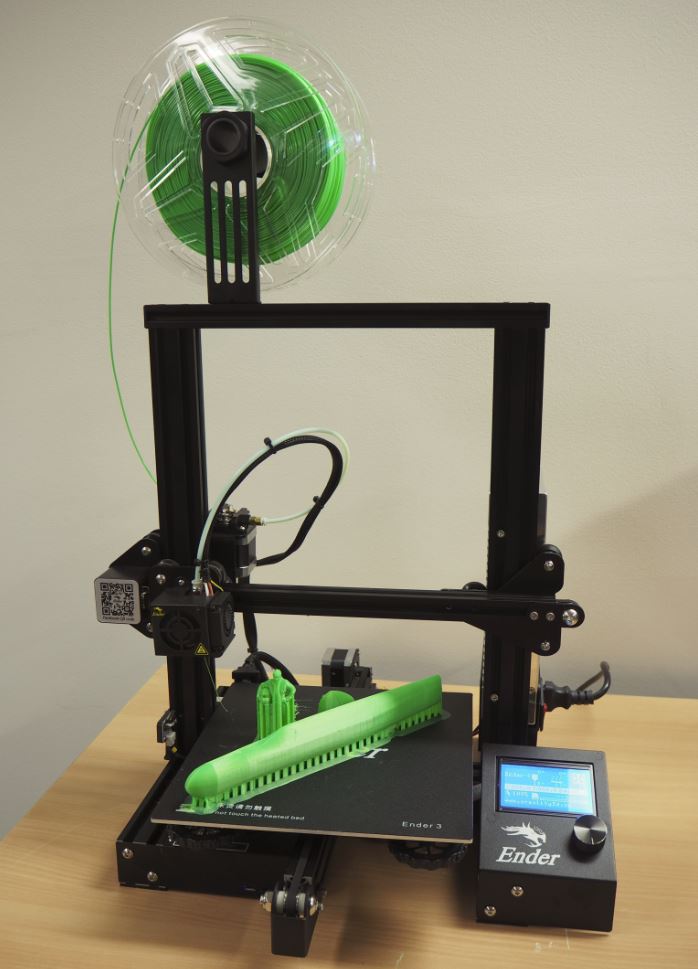
Cover photo: The Creality Ender 3 printing the scale model of KillaJoule and me that you can download here.